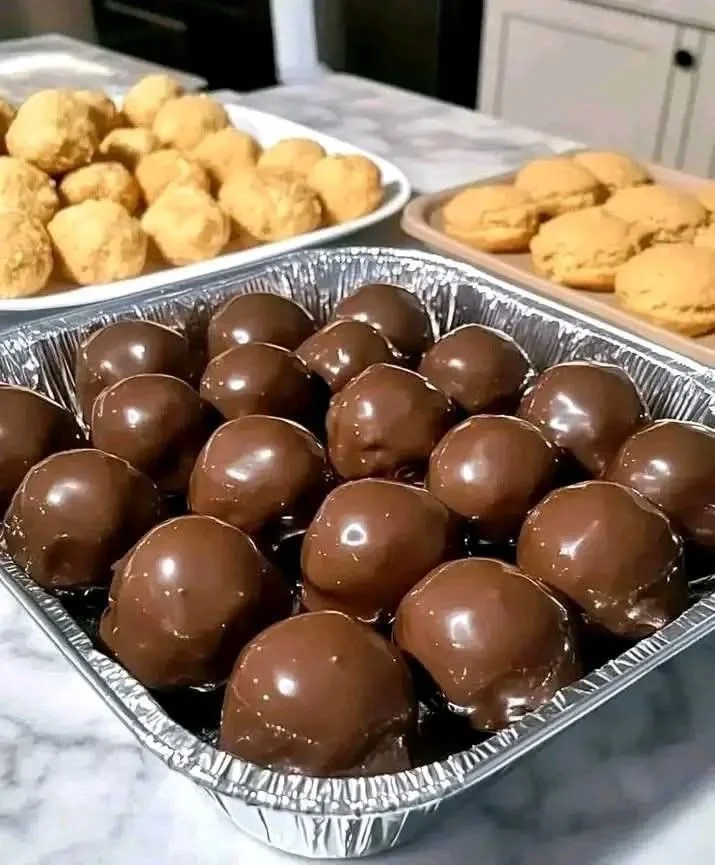
Peanut Butter Balls: Your Secret Weapon for a Quick and Delicious Snack!
Ah, the classic Peanut Butter Balls! If you’re anything like me—juggling work, kids, and a million other things—sometimes you just need a sweet, quick treat that doesn’t require a culinary degree. Enter these delightful morsels. They’re not only a delicious pick-me-up but also ridiculously easy to whip up, making them a perfect solution for those busy afternoons when hunger pangs strike and you don’t have the time (or energy) for a full-on baking session.
Why You’ll Love This Peanut Butter Balls Recipe
These little bites of joy come together in a matter of minutes and will have you feeling like a kitchen superstar. They’re perfect for after-school snacks, pre-workout fuel, or a late-night sweet tooth remedy. Plus, they’ll impress anyone who has the pleasure to nibble on them. Trust me, even my picky eaters can’t resist these treats!
Ingredients:
- 1 cup peanut butter (smooth or crunchy, I won’t judge!)
- 1 cup rolled oats
- 1/2 cup honey or maple syrup
- 1 cup powdered sugar (or a sugar substitute if you’re watching those calories)
- 1 teaspoon vanilla extract
- A pinch of salt (optional, but it enhances the flavors!)
Making Peanut Butter Balls: Step-by-Step
-
Mix It Up: In a large mixing bowl, combine the peanut butter, rolled oats, honey (or maple syrup), vanilla extract, and salt. Mix until everything is well combined. Don’t freak out about it being super sticky—that’s part of the charm!
-
Sweeten the Deal: Gradually add the powdered sugar, mixing until it’s fully incorporated. At this point, you might feel like you’re an overachiever already—because you are!
-
Chill Out: Cover the bowl with plastic wrap and pop it into the fridge for about 30 minutes. This will make the mixture easier to handle when you form the balls. It’s like giving your batter a little spa day!
-
Ball It Up: After the chilling session, take the mixture out and get ready to get your hands messy! Using your hands (or a scoop if you’re fancy), roll the mixture into bite-sized balls—about 1 inch in diameter. Lay them out on a baking sheet lined with parchment paper.
-
Finish Strong: Once you’ve shaped all of your peanut butter balls, you can choose to roll them in crushed nuts, coconut, or even more powdered sugar if you’re feeling indulgent!
-
Chill Again: Place the baking sheet back in the fridge for another 30 minutes to set. After that, you can store them in an airtight container in the fridge… if they last that long!
Cooking Tips
- Customize it: Don’t be afraid to get creative! Swap out the peanut butter for almond or cashew butter, or add in mini chocolate chips for an extra treat. Who doesn’t love a little surprise element?
- Keep it neat: Wet your hands slightly when rolling the balls; it prevents the mixture from sticking to your palms too much. Think of it as a mini spa treatment for your hands!
- No Fridge? No Problem!: If you’re in a rush (or forgot to chill them), you can skip the chilling step, but they might be a tad more difficult to handle.
A Personal Touch
I first discovered this recipe on a particularly hectic afternoon when my kids were crashing after school. I had about five minutes to prevent a meltdown, and everyone knows a hangry child can lead to chaos. So, I threw some ingredients together, and voilà! My kids devoured them while I sipped my much-needed coffee. Now, these peanut butter balls are a staple in our house. I’ve even started adding a pinch of cinnamon for a cozy twist!
FAQs About Peanut Butter Balls
-
Can I substitute the peanut butter?
Absolutely! Feel free to use almond butter or sunflower seed butter for a nut-free version. -
How can I store leftovers?
Keep your peanut butter balls in an airtight container in the fridge for up to a week. Though, let’s be honest, they probably won’t last that long! -
Can these be frozen?
Yes, you can freeze them for up to three months! Just place them in a single layer on a baking sheet, freeze until solid, then transfer to a freezer bag.
There you have it—simple, satisfying, and scrumptiously delightful Peanut Butter Balls! Whether it’s for a quick snack, a gathering with friends, or a treat for yourself (because you deserve it), this recipe is a sure-fire hit. So grab your ingredients, roll up those sleeves, and get ready to indulge in a bite of happiness!
Feeling inspired? Check out some of my other quick snack ideas, like my No-Bake Energy Bites or Chocolate Chip Banana Bread for more easy and delicious recipes to keep your kitchen lively and your family happy.
Meta Description: Peanut Butter Balls are the perfect quick snack for busy days. Easy and delicious, these treats will become your go-to recipe. Try them today!

Peanut Butter Balls
Ingredients
Method
- In a large mixing bowl, combine the peanut butter, rolled oats, honey (or maple syrup), vanilla extract, and salt. Mix until everything is well combined.
- Gradually add the powdered sugar, mixing until fully incorporated.
- Cover the bowl with plastic wrap and refrigerate for about 30 minutes.
- After chilling, roll the mixture into bite-sized balls (about 1 inch in diameter) and place them on a baking sheet lined with parchment paper.
- Once all balls are shaped, choose to roll them in crushed nuts, coconut, or more powdered sugar, if desired.
- Place the baking sheet back in the fridge for another 30 minutes to set.