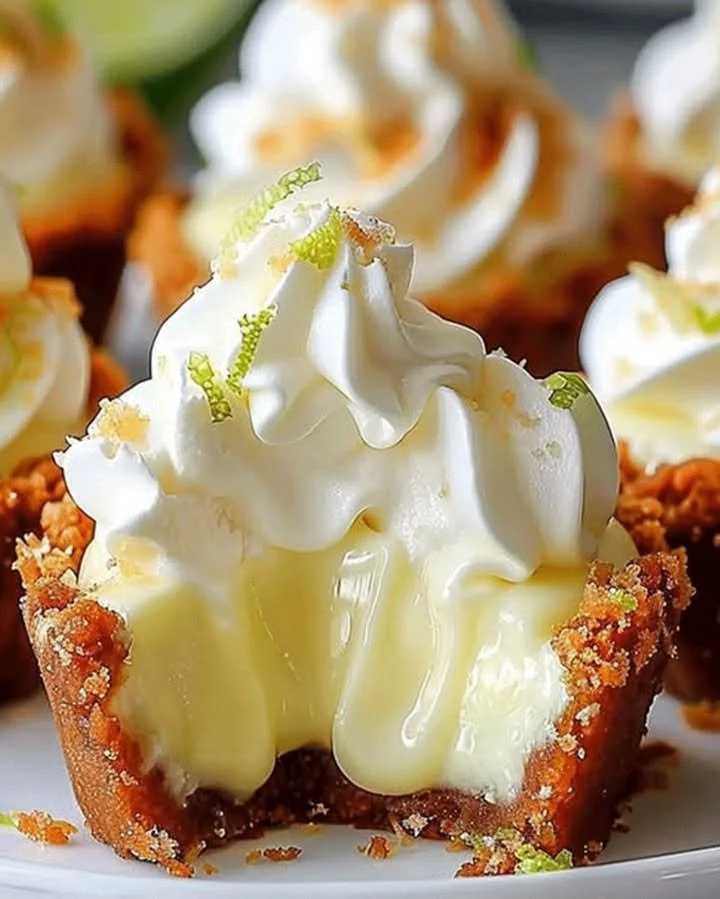
Heavenly No-Bake Mini Key Lime Pies (Primary Keyword)
There’s something joyfully simple about a tiny pie that tastes like sunshine. If you’re juggling work, kids, or both and want a dessert that’s impressive without being fussy, these Heavenly No-Bake Mini Key Lime Pies are a lifesaver. (Primary Keyword) pops up in your kitchen like a little celebration — tangy, creamy, and ready with minimal effort. Whether you’re bringing dessert to a picnic or craving a sweet finish after weeknight tacos, this recipe has your name on it.
I’m Anna — yes, the same one who cooks up sweet and savory magic with my sister Patricia. We love recipes that give maximum flavor with minimum time, and these mini pies are one of our favorites. If you like small, crowd-pleasing desserts, you might also enjoy our take on a full-size key lime pie (it’s great when you want a centerpiece version).
Why You’ll Love This (Primary Keyword)
- Quick to assemble, no oven required (perfect for hot days or when you don’t want to babysit the oven).
- Kid-approved: bright lime flavor with a creamy texture that wins over picky eaters.
- Portable and pretty: individually portioned for parties, school events, or after-dinner treats.
- Uses pantry-friendly staples and one can of sweetened condensed milk.
What You’ll Need (Ingredients)
Makes 12 mini pies
Crust
- 1 1/2 cups graham cracker crumbs (about 10–12 full crackers)
- 6 tablespoons unsalted butter, melted
- 2 tablespoons granulated sugar (optional)
Filling
- 8 ounces cream cheese, softened (room temperature)
- 1 (14-ounce) can sweetened condensed milk
- 1/2 cup fresh key lime juice (or regular lime juice)
- 1 tablespoon lime zest
- Pinch of salt
- 1 cup heavy whipping cream, whipped to soft peaks (or 8 oz whipped topping)
Topping (optional)
- Whipped cream
- Thin lime slices or extra zest
- Crushed graham crackers or toasted coconut for garnish
Note: If you want a lighter filling, swap half the cream cheese for 1/2 cup sour cream or add an extra 1/2 cup whipped cream.
Step-by-Step Directions (Simple, friendly, and doable)
-
Prep your tins. Line a 12-cup muffin tin with paper liners or use silicone cups for easy removal. If you’re short on liners, a shallow tart pan or small ramekins work too.
-
Make the crust. In a bowl, mix graham cracker crumbs with melted butter and sugar until the crumbs look like wet sand. Press about 2 tablespoons of the crumb mixture into the bottom of each liner. Use the bottom of a shot glass or measuring cup to pack them firmly. Chill the crusts in the fridge while you make the filling—about 15 minutes helps them set up.
-
Whip the cream. If you’re using heavy cream, whip it to soft peaks and set aside. This keeps the filling light and airy. If you prefer to skip fresh whipping, use store-bought whipped topping; it still works great.
-
Mix the base. In a medium bowl, beat the softened cream cheese until smooth. Add the sweetened condensed milk and beat gently until combined. Stir in the lime juice, lime zest, and a pinch of salt. The mixture will thicken as it chills.
-
Fold in the whipped cream. Gently fold the whipped cream (or whipped topping) into the lime mixture until smooth and slightly fluffy. This step makes the filling silky and helps it set without baking.
-
Fill the crusts. Spoon or pipe the filling into the chilled crusts, filling each almost to the top. Smooth the tops with a small spatula or the back of a spoon.
-
Chill until set. Refrigerate the pies for at least 2 hours, or overnight if you want them extra firm and easy to transport. If you’re pressed for time, pop them in the freezer for 30–45 minutes, but don’t forget them—these are best served chilled, not frozen solid.
-
Add the finishing touches. Right before serving, add a dollop of whipped cream and a little lime zest or a thin lime wheel to each mini pie.
Cooking Tips (short and practical)
- No fresh limes? Bottled lime juice works in a pinch, but fresh juice gives the brightest flavor. If you use bottled, start with a little less and taste.
- Want single-serve perfection? Use a piping bag to fill crusts neatly — it’s an easy step that makes them party-ready.
- To speed cooling, pop the assembled pies into the freezer for 30 minutes, then transfer to the fridge. This keeps them creamy but firm.
- Crust too crumbly? Add a bit more melted butter, one teaspoon at a time, until it holds when pressed.
- Make-ahead: You can assemble the pies a day ahead and keep them covered in the fridge. Add whipped cream garnish just before serving.
A Little Kitchen Story (a personal moment)
This recipe became my go-to for summer potlucks after my niece declared them “the green cupcakes” and asked for them every birthday. Patricia and I would make a double batch and hide a few in the freezer for midnight cravings. They’re small, but somehow they carry enough tang to make everyone smile — especially when you tell them there’s no oven involved and they still taste like you worked all afternoon.
(Secondary Keywords) in the Steps
- When mixing (Secondary Keywords) into the filling, fold gently so the texture stays airy.
- For a smoother (Secondary Keywords) experience while pressing crusts, dampen your tool slightly so crumbs don’t stick.
FAQs — Quick Answers (you’d ask these at my kitchen counter)
Q: Can I substitute the cream cheese?
A: Yes. Swap half the cream cheese for sour cream for a tangier filling, or use full-fat Greek yogurt for a lighter texture. If you want a completely dairy-free version, try a vegan cream cheese and coconut whipped cream — results will be slightly different but tasty.
Q: How long do these keep in the fridge?
A: Stored in an airtight container, mini pies last 3–4 days in the refrigerator. If you’ve garnished with fresh whipped cream, try to serve within 24 hours for best presentation.
Q: Can I freeze them?
A: Yep. Freeze un-garnished pies for up to 1 month. Thaw overnight in the fridge and add whipped cream right before serving.
Q: What’s the best lime to use?
A: Key limes are traditional and a bit more floral, but regular Persian limes are just fine and easier to find. Use fresh juice whenever possible for the brightest flavor.
Q: Can I make these gluten-free?
A: Swap graham crumbs for gluten-free graham crumbs or crushed gluten-free cookies. Make sure the crust holds by adding a tad more butter if needed.
Pairing and Serving Suggestions
- Serve these with a tall glass of iced tea, cold brew, or a light sparkling wine for a lovely grown-up finish.
- For a contrast in texture, sprinkle a little toasted coconut on top or serve alongside fresh berries.
- If you like no-bake desserts, you might enjoy our no-bake banana split cheesecake for another easy crowd-pleaser.
Variations to Try
- Coconut Key Lime: Replace 1/4 cup of the graham crumbs with toasted coconut and garnish with shredded toasted coconut.
- Margarita Mini Pies: Add a splash (1–2 teaspoons) of tequila to the filling for an adult twist and rim the crust with a pinch of sugar and lime zest.
- Chocolate Twist: Use chocolate cookie crumbs for the crust for a chocolatey contrast to the tart filling.
Short Troubleshooting Guide
- Filling is too runny: Cold temperatures help set the filling; chill longer. If it’s still loose, try folding in a bit more whipped cream or a teaspoon of gelatin dissolved in warm water (only if you want to use gelatin).
- Crust falls apart on removal: Use silicone cups or serve in liners to avoid handling. If you prefer removing pies, press the crust firmly and chill longer before filling.
Why this works (in plain terms)
The sweetened condensed milk reacts with the lime juice to thicken slightly and gives a creamy texture without baking. Cream cheese adds body and tang, while whipped cream keeps the filling airy. The cold sets everything up for that perfect spoonable texture every time.
Want other mini-pie ideas? These mini pumpkin pies are a seasonal favorite and use a similar technique for easy individual desserts.
Conclusion
If you’re looking for a fuss-free, crowd-pleasing dessert that still feels special, these Heavenly No-Bake Mini Key Lime Pies hit the sweet spot. They’re tangy, creamy, and made for busy evenings, backyard barbecues, or last-minute dessert rescues. For more inspiration and similar recipes, check out this Easy Mini No Bake Key Lime Pie Recipe, our friends’ take on a Mini No Bake Key Lime Pie Recipe | Buy This Cook That, and a classic version at Best Key Lime Pie – Mom On Timeout. Go on — make a batch, grab a cold drink, and savor the moment. You deserve it.
Meta description (150 characters)
(Primary Keyword) — Quick no-bake mini key lime pies for busy cooks. Tangy, creamy, and ready in under 2 hours. Perfect for parties and weeknights.

No-Bake Mini Key Lime Pies
Ingredients
Method
- Prep your tins. Line a 12-cup muffin tin with paper liners or use silicone cups for easy removal. If short on liners, a shallow tart pan or small ramekins work too.
- Make the crust. In a bowl, mix graham cracker crumbs with melted butter and sugar until the crumbs look like wet sand. Press about 2 tablespoons of the crumb mixture into the bottom of each liner. Chill the crusts in the fridge for about 15 minutes.
- Whip the cream. If using heavy cream, whip it to soft peaks and set aside.
- Mix the base. In a medium bowl, beat the softened cream cheese until smooth. Add sweetened condensed milk and beat gently until combined. Stir in lime juice, lime zest, and a pinch of salt.
- Fold in the whipped cream. Gently fold the whipped cream (or whipped topping) into the lime mixture.
- Fill the crusts. Spoon or pipe the filling into the chilled crusts, filling each almost to the top.
- Chill until set. Refrigerate the pies for at least 2 hours, or overnight if you prefer them extra firm.
- Add the finishing touches. Right before serving, add a dollop of whipped cream and a little lime zest or a thin lime wheel to each pie.