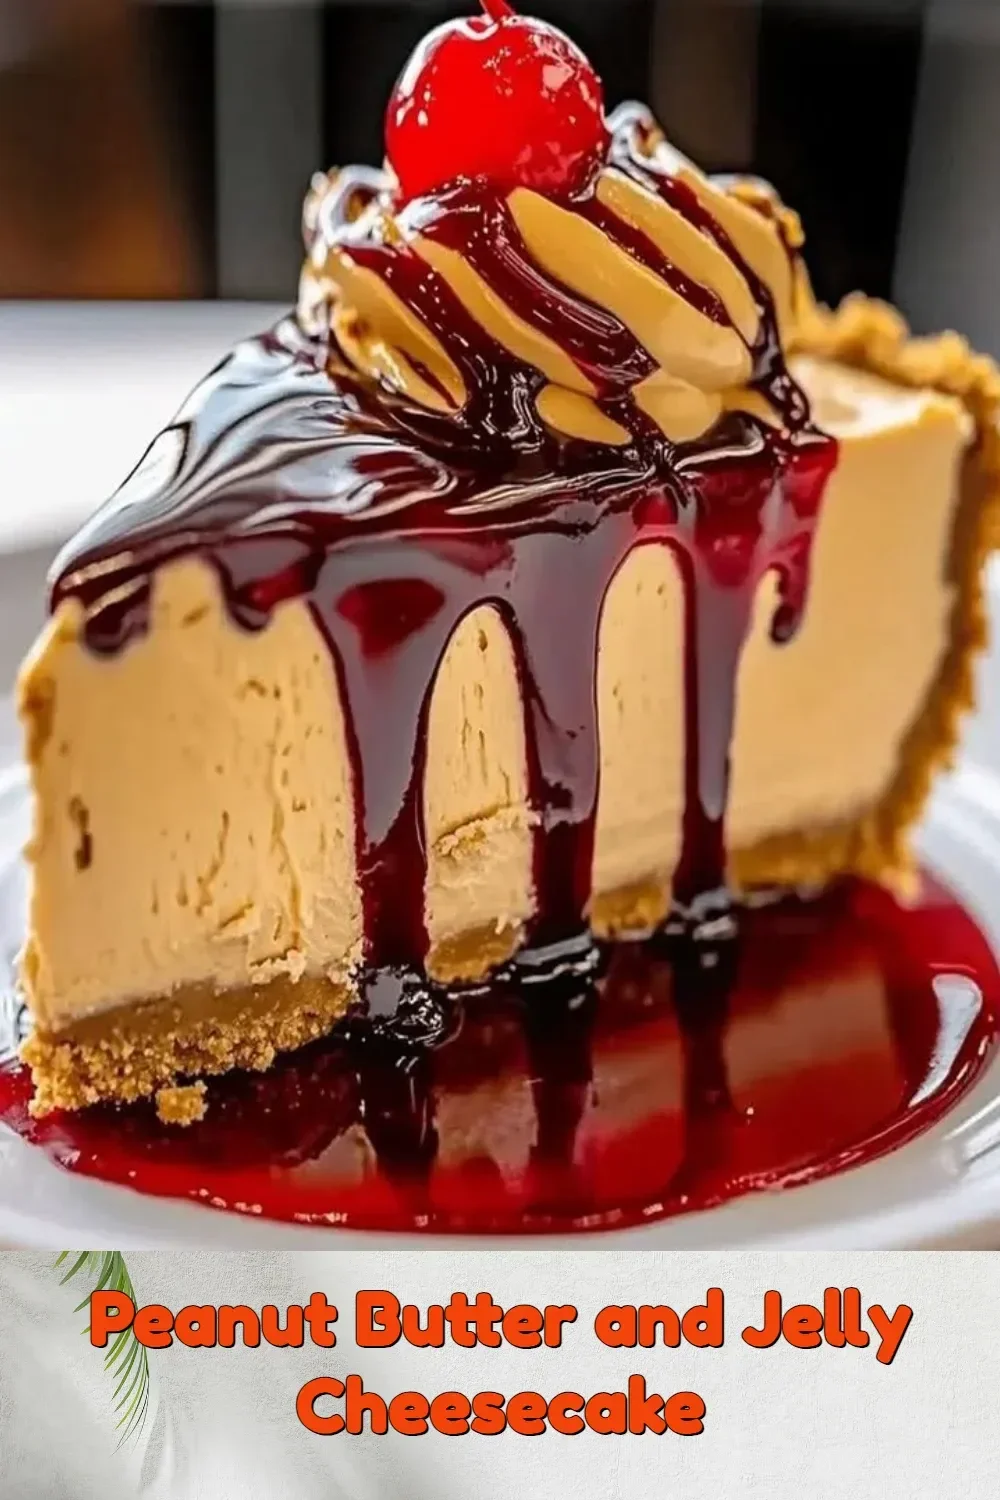
The Ultimate Peanut Butter and Jelly Cheesecake: A Sweet Nostalgia
When it comes to desserts, few combinations evoke warm memories quite like peanut butter and jelly. Today, I’m thrilled to introduce you to my Peanut Butter and Jelly Cheesecake, a scrumptious mash-up that takes your childhood favorite to all-new heights! Perfect for busy moms and working professionals alike, this dessert is not only easy to whip up but also guaranteed to impress your loved ones.
So, if you’re ready to indulge in a creamy, dreamy slice of nostalgia, let’s dive into this delightful recipe!
Why You’ll Love This Peanut Butter and Jelly Cheesecake
This Peanut Butter and Jelly Cheesecake is like a hug on a plate. Imagine the smooth, rich texture of the cheesecake paired with a swirl of sweet jelly—it’s a beautiful marriage of flavors that will have everyone coming back for seconds (and thirds, no judgment here!). Plus, it’s a fun way to bring a bit of whimsy to your dessert table, whether it’s a birthday party, family gathering, or just a Tuesday evening treat.
Ingredients
Before we roll up our sleeves and embark on this culinary adventure, let’s gather our trusty ingredients. You’ll need:
-
For the Crust:
- 1 ½ cups graham cracker crumbs
- ½ cup unsalted butter, melted
- 2 tablespoons sugar
-
For the Cheesecake Filling:
- 16 ounces cream cheese, softened
- ½ cup sugar
- 1 cup peanut butter
- 1 teaspoon vanilla extract
- 3 large eggs
-
For the Jelly Swirl:
- ½ cup jelly (strawberry or grape, whichever you prefer)
Steps to Cheesecake Heaven
-
Preheat the Oven:
Start by preheating your oven to 325°F (160°C). You’ll want it nice and warm for our cheesecake to bake to perfection. -
Make the Crust:
In a mixing bowl, combine graham cracker crumbs, melted butter, and sugar until well combined. Press this mixture firmly into the bottom of a 9-inch springform pan. Think about it like you’re building a delicious little fortress to protect all the creamy goodness that’s to come! -
Prepare the Cheesecake Filling:
In a large bowl, beat the softened cream cheese and sugar until smooth and creamy. You can use a hand mixer or, if you’re feeling strong, just your trusty spatula! Add in the peanut butter and vanilla extract, mixing until combined. -
Add the Eggs:
Now, one at a time, add the eggs to the mixture, mixing on low speed until just incorporated. Avoid overmixing, or your cheesecake might end up with cracks—it still tastes divine, but we want it to look fabulous too! -
Layer in the Jelly:
Pour half of the cheesecake filling over the crust. Then, drop spoonfuls of jelly on top of the filling. Use a knife or skewer to swirl the jelly into the cheesecake gently—artistic flair is optional but highly encouraged! -
Final Touch:
Pour the remaining cheesecake filling over the top, finishing with another swirl of jelly. Now’s the time to get creative—don’t be shy! -
Bake the Cheesecake:
Place the springform pan in the preheated oven and bake for about 50-60 minutes or until the center is set but still slightly jiggly. A little jiggle is a good sign—it means your cheesecake will be creamy! -
Cool and Chill:
Remove the cheesecake from the oven and let it cool at room temperature for about an hour. Then, refrigerate for at least 4 hours, preferably overnight, to let those flavors mingle beautifully. -
Serve and Enjoy:
When you’re ready to serve, carefully unclip the springform pan, slice your masterpiece, and watch as faces light up at the first bite. Perhaps even snap a few pics for social media—because who wouldn’t want to share this beauty?
Cooking Tips
- Jelly Choice: You can mix the flavors of jelly if you’re feeling adventurous—think strawberry and raspberry together for a fun twist!
- Peanut Butter Variations: Feel free to experiment with different types of peanut butter. Crunchy adds an interesting texture, while natural peanut butter can make it a tad healthier!
- No Springform Pan? No problem! Use a regular pie pan and just adjust the baking time; it may take a bit longer to set but will still turn out tasty.
A Personal Touch
I still remember the first time I made a dessert with my kids. We were baking cookies, and let’s just say there was more flour on the floor than in the mixing bowl! But that’s the beauty of cooking—it’s not always about the finished product, but the memories you create in the kitchen. This Peanut Butter and Jelly Cheesecake has become a beloved family favorite, and I hope it does the same for you!
FAQs
Can I substitute cream cheese?
Absolutely! You can use Neufchâtel cheese for a lower-fat option, or even a dairy-free cream cheese if you’re going plant-based.
How can I store leftovers?
Keep any leftover cheesecake covered in the fridge for up to a week—though let’s be real, it’s unlikely you’ll have any left!
Can I freeze this cheesecake?
Yes! Just wrap it tightly and store it in the freezer for up to three months. Thaw it in the fridge overnight before serving.
As you gather your ingredients and step into your kitchen, remember that this Peanut Butter and Jelly Cheesecake isn’t just a recipe; it’s a chance to create memories, evoke childhood joy, and share love through food. So grab that apron, channel your inner chef, and let’s whip up something magical together!
Meta Description: Peanut Butter and Jelly Cheesecake is the perfect recipe for nostalgic cravings. Quick, easy, and delicious, this dessert is a must-try!