Cool Off with a Slice of Coffee Ice Cream Cake
Is there anything more delightful than a summer afternoon spent in the shade with a slice of Coffee Ice Cream Cake? I think not! This recipe is not just an ordinary cake—it’s a mesmerizing fusion of rich coffee flavor, creamy ice cream, and the joy of bringing family and friends together. Let’s be real, life can be busy and chaotic, but we deserve those sweet moments that take us to dessert paradise. Picture this: your friends gather around, everyone digging into a scoop of heaven while reminiscing about memories from the good old days. Yep, that’s the magic of this recipe!
Why You’ll Love This Coffee Ice Cream Cake
First, if you find yourself craving an effortless dessert that impresses, this cake is your new best friend. It’s perfect for any occasion—a birthday party, a summer picnic, or just because it’s Wednesday and you need a pick-me-up! Plus, it’s a champ at feeding a crowd without requiring hours in the kitchen. Now, let’s dive into how to bring this deliciousness to life!
Ingredients You’ll Need
To whip up this delightful Coffee Ice Cream Cake, you’ll want to gather the following ingredients:
- 1 package of chocolate cake mix (plus ingredients on package)
- 1 quart coffee ice cream, softened
- 1 cup whipped topping
- ½ cup chocolate syrup
- ½ cup brewed coffee (cooled)
- Optional: chocolate shavings and coffee beans for decoration
Directions: Making Magic Happen
Now, let’s create some kitchen magic. This recipe is straightforward, and trust me, you won’t need a culinary degree to pull it off!
-
Bake the Cake: Start by preheating your oven according to the package instructions for the chocolate cake. Mix the cake batter as directed and pour it into two round cake pans. Bake until a toothpick inserted comes out clean, usually about 30 to 35 minutes. Once baked, allow the cakes to cool in the pans for a bit before transferring them to a wire rack to cool completely. (And yes, you can snitch a piece while you’re waiting—no judgment here!)
-
Assemble the Layers: Once your cake is cool, place one layer on a serving plate. Soak it with about ¼ cup of the cooled brewed coffee. This step adds a flavorful depth and keeps your cake moist. Next, generously spread the softened coffee ice cream over the first layer. Start to feel the excitement growing!
-
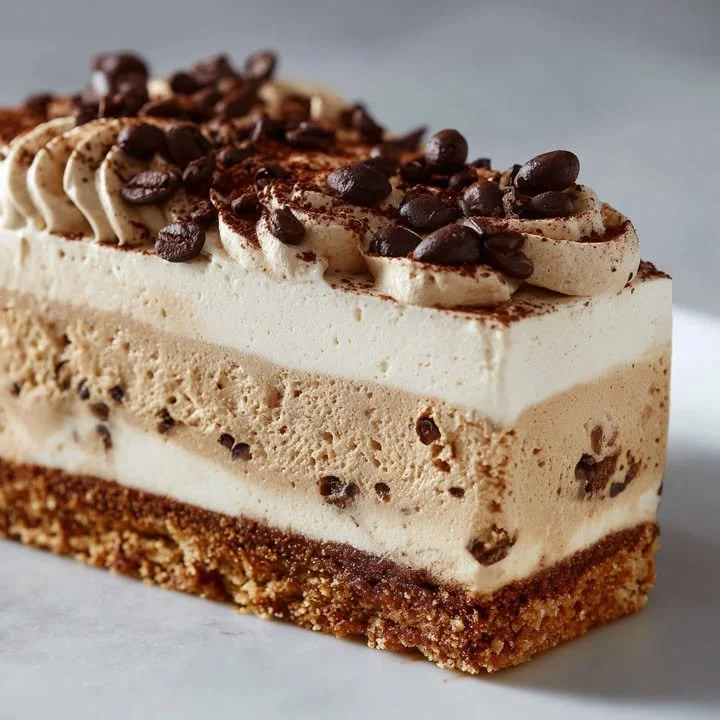
Top and Repeat: Place the second cake layer on top of the ice cream layer. Think of it as putting on a cozy blanket. Now, drizzle the chocolate syrup over this layer and spread the whipped topping to create a beautiful finish. If you’re feeling a little fancy (and why shouldn’t you?), decorate with chocolate shavings and whole coffee beans to really wow your guests!
-
Chill Out: Before you serve it up, pop the cake into the freezer for about 2-3 hours. This allows the ice cream to firm up and lets all those flavors meld together beautifully.
-
Slice and Enjoy: When you’re ready, take it out and slice into it like the cake boss you are! Watch as everyone’s eyes light up with delight upon taking their first bite of your masterpiece.
Cooking Tips from Your Kitchen Companion
- If you’re short on time, you can use store-bought ice cream instead of making your own—ain’t nobody got time for that some days!
- Want to switch it up? Treat yourself by swapping coffee ice cream for vanilla or mocha flavors.
- Don’t stress about perfection; a rustic look adds to the charm. Just remember, it’s all about the taste!
Sweet Memories
This Coffee Ice Cream Cake creates a lovely tradition for my family. After a day filled with summer activities, we would gather around the table, indulge in this treat, and share what made our day special. It’s a beautiful reminder that, while life gets busy, we should carve out moments to slow down and savor the sweetness—literally!
FAQs About Coffee Ice Cream Cake
Can I substitute any ingredients in this recipe?
Absolutely! If you’re not a huge coffee lover, feel free to use chocolate or vanilla ice cream instead. The world is your oyster!
How can I store leftovers?
If you have any cake left (I know, it’s a shocker!) just wrap it tightly in plastic wrap or aluminum foil and stash it in the freezer. It should keep nicely for a week. Although, let’s be real—you might not have any left to store!
Can I make this cake in advance?
Totally! This cake can be prepared a day ahead, allowing you more time to focus on other delightful things.
Now that we’ve walked through the wonders of this Coffee Ice Cream Cake, grab your apron, gather your ingredients, and let’s make a dessert that’s guaranteed to please. Trust me, you won’t regret one sweet, luscious bite! And who knows? This might just become your go-to treat for all occasions, just like it did for me.
So what are you waiting for? Let’s whip up a little magic in the kitchen together!
Meta Description
Coffee Ice Cream Cake is the perfect recipe for a quick dessert that delights. Easy to make and delicious—for those sweet moments, try it today!

Coffee Ice Cream Cake
Ingredients
Method
- Preheat your oven according to the package instructions for the chocolate cake.
- Mix the cake batter as directed and pour it into two round cake pans.
- Bake until a toothpick inserted comes out clean, usually about 30 to 35 minutes.
- Allow the cakes to cool in the pans for a bit before transferring them to a wire rack to cool completely.
- Once your cake is cool, place one layer on a serving plate.
- Soak it with about ¼ cup of the cooled brewed coffee.
- Spread the softened coffee ice cream over the first layer.
- Place the second cake layer on top of the ice cream layer.
- Drizzle the chocolate syrup over this layer and spread the whipped topping.
- Decorate with chocolate shavings and whole coffee beans if desired.
- Place the cake into the freezer for about 2-3 hours to firm up.
- Slice and enjoy!