Sweet and Chewy Coconut Strawberry Thumbprint Cookies: A Delicious Delight!
As we navigate the whirlwind of daily life, it’s all too easy to find ourselves yearning for a sweet little treat to perk up our day. Coconut Strawberry Thumbprint Cookies are the answer you never knew you needed! Not only are they a jaw-droppingly delightful combination of flavors and textures but they also come together in just a few simple steps, making them a perfect go-to for busy moms, professionals, or anyone looking to indulge their sweet tooth.
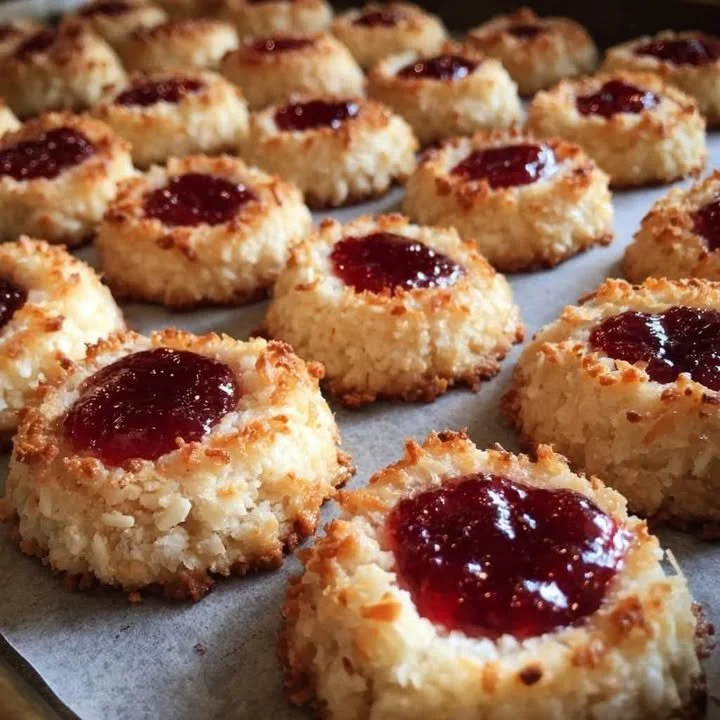
Get ready for a cookie that’s so good it should come with a warning: irresistible! With coconut’s cheery flakiness mingling with the delicious tartness of strawberries, these cookies will have you dancing in the kitchen and sprinkling joy everywhere.
Why You’ll Love These Coconut Strawberry Thumbprint Cookies
Let’s face it. Life is tough, and sometimes you need a cookie that feels like a hug. Whether you’re browsing Pinterest late at night, trying to find the perfect recipe to impress your friends, or just looking for a new snack for the kiddos, these cookies are your friends. They’re easy to make, packed with flavor, and are a beautiful way to enjoy a sweet moment with loved ones. So grab your apron, and let’s make some magic happen in the kitchen!
Ingredients
Before we dive in, here’s what you’ll need to whip up these beauties:
- 1 cup unsweetened shredded coconut
- 1 ½ cups all-purpose flour
- ½ cup sugar
- ¼ cup brown sugar
- 1 teaspoon baking powder
- ¼ teaspoon salt
- ½ cup unsalted butter, softened
- 1 large egg
- 1 teaspoon vanilla extract
- ½ cup strawberry jam (or your favorite jam)
Get Ready to Bake: Steps to Perfection
-
Preheat Your Oven: Preheat your oven to 350°F (175°C). Because nothing says “time to bake” like that mouth-watering smell of cookies wafting through the house!
-
Mix Dry Ingredients: In a mixing bowl, combine the flour, baking powder, salt, and shredded coconut. Give that a good stir and set aside. This is the moment to connect with your inner baker—mixing those dry ingredients is like a spa day for your flour!
-
Cream the Butter and Sugars: In another bowl, cream together the softened butter, sugar, and brown sugar until fluffy. It should be light and airy—think of it as turning your butter into a cloud. Add the egg and vanilla extract, mixing until everything comes together like old friends reuniting.
-
Combine and Form: Gradually add the dry ingredients to the wet mixture, stirring until just combined. Don’t overdo it! We want delightful cookies, not tough little pucks.
-
Shape Those Cookies: Roll the dough into balls about an inch in diameter. Place them on a parchment-lined baking sheet. Gently press your thumb into the center of each ball to create that iconic thumbprint dent where the jam will sit. Don’t be shy—this is your moment!
-
Fill with Jam: Spoon a dollop of strawberry jam into each thumbprint. Remember, you’re making cookies, not tiny jam puddles, so stick to a teaspoon or so.
-
Bake: Pop your baking sheet into the preheated oven and bake for about 15-18 minutes, until the edges are golden. Feel free to sneak a peek through the oven door—you know you want to!
-
Cool and Serve: Once they’re out of the oven, let them cool for a bit. This is probably the hardest part—smelling those warm cookies but not being able to devour them immediately!
Cooking Tips for the Best Cookies
- Jam Variation: Feel free to mix it up! These cookies are just as delicious with raspberry or apricot jam. Think of it as an adventure in the world of flavors!
- Watch the Bake Time: Keep an eye on those bad boys, because ovens can be as unpredictable as a toddler in a candy store.
- Storage: Store any leftovers in an airtight container. Let’s pretend there will be leftovers – but let’s be real; they might disappear faster than you can say “Cookie Monster”!
Personal Anecdote
These Coconut Strawberry Thumbprint Cookies hold a special place in my heart. A few years ago, my sister Patricia and I decided to have a baking marathon one rainy afternoon. We were armed with flour, butter, and an endless supply of laughter. By the end of the day, the kitchen was a mess, but we had a batch of these delicious cookies that instantly became a family favorite. Every time I make them, I’m reminded of that day filled with joy and sisterly love.
FAQs
Can I use different fruits instead of strawberries?
Absolutely! Any jam or fruit preserves will work. You could even venture into the world of citrus—think lemon curd!
How can I store leftovers?
These cookies will last up to one week in an airtight container. Trust me; they’re best fresh, but I won’t judge you if you want to save a few for later.
Now that you’ve crafted these delightful Coconut Strawberry Thumbprint Cookies, it’s time to share the love! Whether you’ve baked them for a gathering or just to keep good vibes flowing at home, they’re sure to make a splash. Remember, cooking isn’t just about the food—it’s about the memories we create and the joy we spread.
So the next time you find yourself in need of a little sunshine, just whip up a batch of these cookies and unleash a world of flavors. Happy baking, lovely friends!
Meta Description
Coconut Strawberry Thumbprint Cookies are the perfect sweet treat for your busy day. Quick, easy, and delicious, these cookies will steal your heart.
Feel free to explore more delicious recipes on Anna’s Kitchen!

Coconut Strawberry Thumbprint Cookies
Ingredients
Method
- Preheat your oven to 350°F (175°C).
- In a mixing bowl, combine the flour, baking powder, salt, and shredded coconut. Stir and set aside.
- In another bowl, cream together the softened butter, sugar, and brown sugar until fluffy. Add the egg and vanilla extract, mixing until combined.
- Gradually add the dry ingredients to the wet mixture, stirring until just combined.
- Roll the dough into balls about an inch in diameter and place on a parchment-lined baking sheet.
- Gently press your thumb into the center of each ball to create a thumbprint dent.
- Spoon a dollop of strawberry jam into each thumbprint.
- Bake for about 15-18 minutes, until the edges are golden.
- Let the cookies cool for a bit before serving.