title: Lemon Raspberry Layered Pie — Bright, No-Bake Joy for Busy Days
meta: "Lemon Raspberry Layered Pie — a bright, no-bake dessert for busy families. Quick, easy, and crowd-pleasing. Make-ahead, creamy, and berry-bright."
Lemon Raspberry Layered Pie — Bright, No-Bake Joy for Busy Days
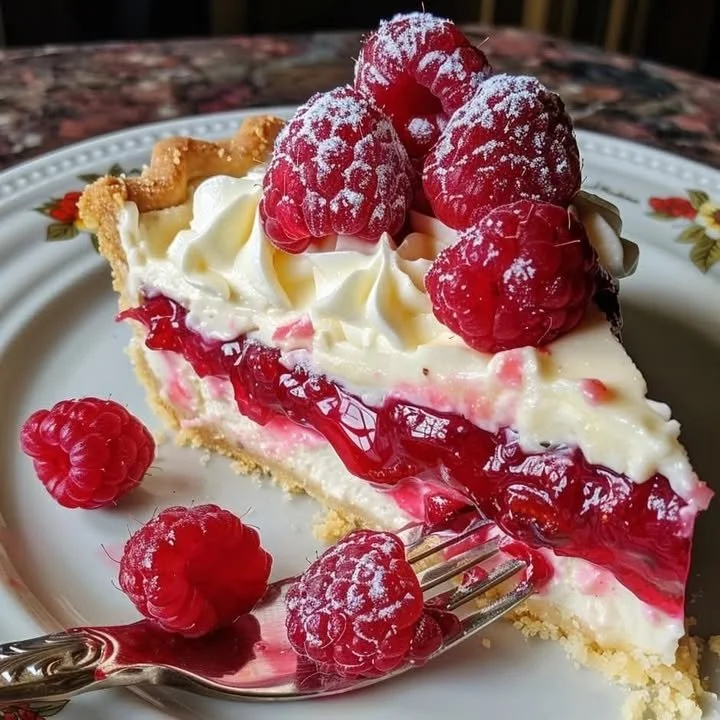
If you’re looking for a dessert that says "I made something special" without stealing your whole afternoon, this Lemon Raspberry Layered Pie is your new best friend. With a tangy lemon layer, pillowy cream, and a glossy raspberry ribbon, this lemon raspberry pie looks fancy but is surprisingly easy — perfect for birthdays, potlucks, or a treat after the school run.
I’m Anna, and my sister Patricia and I love taking simple ingredients and turning them into dishes that make people smile. This layered dessert is one of those crowd-pleasers that keeps well in the fridge and disappears fast. If you need something bright, make-ahead, and just the right mix of sweet and tart, read on.
Why You’ll Love This Lemon Raspberry Layered Pie
- No-bake pie that looks like you spent hours in the kitchen.
- Kid-approved (and adult-approved) tangy lemon plus sweet raspberries.
- Make-ahead friendly — perfect for busy schedules or last-minute guests.
Notes before we dive in: this recipe is written to be approachable for all cooks. I’ll share shortcuts (store-bought lemon curd works great), swaps for picky eaters, and a couple of tiny tricks I learned the hard way so your pie sets perfectly every time.
Ingredients
Crust
- 1 1/2 cups (150 g) graham cracker crumbs (about 10–12 crackers)
- 6 tbsp (85 g) unsalted butter, melted
- 2 tbsp granulated sugar
Lemon Layer (curd-style)
- 1 1/2 cups (360 ml) lemon curd (homemade below or store-bought)
- Zest of 1 lemon (optional for extra brightness)
Cream Layer
- 8 oz (225 g) cream cheese, softened
- 1 cup (240 ml) heavy whipping cream, cold
- 1/2 cup (60 g) powdered sugar
- 1 tsp vanilla extract
Raspberry Swirl
- 2 cups (250 g) fresh or frozen raspberries
- 2–3 tbsp sugar (to taste)
- 1 tsp cornstarch mixed with 1 tbsp water (optional, to thicken)
- 1 tbsp lemon juice
Garnish (optional)
- Fresh raspberries, lemon slices, mint leaves
- Extra lemon zest
Makes one 9-inch (23 cm) pie. Serves 8–10.
Quick Note on Tools
- 9-inch pie dish or springform
- Electric mixer (hand or stand) or whisk
- Small saucepan (for raspberry sauce or homemade curd)
- Rubber spatula and bowls
How to Make Lemon Raspberry Layered Pie — Step by Step
- Make the crust
- Preheat the oven to 350°F (175°C) if you want a lightly toasted crust. (You can skip baking for a quicker no-bake version — chilling works too.)
- Mix graham crumbs, sugar, and melted butter in a bowl until evenly moistened.
- Press mixture firmly into the bottom and up the sides of your pie dish. Use the back of a measuring cup to compact it.
- Bake 8–10 minutes for a firmer crust, or chill 30 minutes if not baking. Let cool completely.
- Prepare the lemon curd (or use store-bought)
- For homemade: whisk together 3/4 cup sugar, 3 tbsp cornstarch, 3 egg yolks, 1/2 cup lemon juice, and 2 tbsp lemon zest in a saucepan over medium heat. Cook, stirring constantly, until thickened (about 5–7 minutes). Remove from heat and whisk in 4 tbsp butter until smooth. Chill before using.
- If short on time, a good-quality store-bought lemon curd works wonderfully and saves you a step.
- Make the raspberry swirl
- In a small saucepan, combine raspberries and sugar. Cook over medium heat until raspberries break down (5–7 minutes).
- If you prefer a thicker sauce, stir in the cornstarch slurry and cook 1–2 minutes more until glossy.
- Press through a fine-mesh sieve if you want a seedless sauce; otherwise, leave the seeds for a rustic bite.
- Stir in lemon juice, then cool to room temperature.
- Make the cream layer
- Beat softened cream cheese with powdered sugar and vanilla until smooth.
- In a separate bowl, whip the cold heavy cream to stiff peaks.
- Fold whipped cream into the cream cheese mixture gently, preserving as much lightness as possible.
- Assemble the pie
- Spread a thick, even layer of lemon curd over the cooled crust.
- Spoon half the cream mixture over the lemon layer and smooth.
- Drop small spoonfuls of raspberry sauce across the cream, then use a skewer to drag through and create pretty swirls.
- Add the remaining cream layer on top, smoothing gently. Finish with a few more raspberry dollops and a light swirl if desired.
- Chill the pie for at least 4 hours (overnight is best) so the layers set nicely.
- Serve
- Garnish with extra raspberries, lemon zest, or mint just before slicing.
- Use a hot, clean knife for neat slices — wipe between cuts.
Cooking Tips and Little Tricks (so it comes out like mine)
- Short on time? Use store-bought lemon curd and jarred raspberry sauce. No shame — life happens.
- For a seedless finish, press the raspberry sauce through a sieve. My kids prefer it that way.
- If your crust gets soggy, prebake it briefly and brush with melted chocolate or a thin layer of jam to create a moisture barrier.
- To slice cleanly, dip your knife in hot water and dry it between slices.
- Make this pie a day ahead. It tastes better after the flavors mingle and gives you one less thing to worry about on dessert day.
Substitutions & Dietary Tweaks
- Gluten-free: use gluten-free graham crackers or almond flour crust.
- Lower sugar: use a sugar substitute in raspberry sauce, or reduce powdered sugar in the cream layer.
- Egg-free lemon layer: use a vegan lemon curd recipe or a thickened lemon pudding. Store-bought curd often contains eggs, so check labels if needed.
- Stabilized whipped cream: add 1 tsp gelatin (bloomed) to the warmed cream before whipping for longer hold in hot weather.
A Little Kitchen Story
This pie became a regular at our house during one summer when the grandkids came over every Tuesday. They loved the lemony zing and the raspberry color — which, of course, meant I had to make two. One for us and one for them. Patricia always joked that kids rate desserts on color first, taste second. I think she might be right.
FAQs
Can I use frozen raspberries?
- Yes. Thaw them first and drain excess liquid. Frozen berries work well for the raspberry swirl.
Can I substitute store-bought lemon curd?
- Absolutely. Store-bought curd saves time and still tastes great. If it’s very thick, let it sit at room temp briefly so it spreads easily.
How long will the pie keep?
- Stored covered in the fridge, it’s best within 3–4 days. The crust may soften a bit over time but the flavor holds up.
Can I freeze this pie?
- You can freeze it for up to one month. Wrap tightly in plastic and foil. Thaw in the fridge overnight before serving.
What if my lemon curd is lumpy?
- Whisk vigorously over low heat to smooth it or strain through a sieve. If it’s still stubborn, store-bought curd is a fine fallback.
Serving Suggestions
- Pair slices with a cup of Earl Grey tea or a cold glass of sparkling water with lemon.
- For an adult twist, serve with a splash of limoncello or a dollop of mascarpone mixed with a little honey.
Related Recipes & Where to Explore More
Curious about other citrus or berry desserts? Visit the site to browse more recipes and ideas. Check out my About page to read the story behind the recipes and why dessert time is my favorite time: Meet Anna & Patricia. For a quick list of similar recipes and seasonal ideas, browse more recipes. Want to go back to the homepage and see what’s new this week? Click here: al3ab.tech home.
Conclusion
This Lemon Raspberry Layered Pie is the kind of dessert that looks like you spent hours fussing and only took you an afternoon — the perfect win for busy cooks who want big flavor with little stress. If you want a few variations or inspiration for presentation, check this classic no-bake version from Real Housemoms: Lemon Raspberry No Bake Pie ⋆ Real Housemoms. For a creamier take on layered lemon desserts, this Creamy Lemon Layered Pie is a lovely reference: Creamy Lemon Layered Pie – Who Needs A Cape?. And if you love a meringue finish, peek at this raspberry lemon meringue for more ideas: Raspberry Lemon Meringue Pie Recipe.
Make it ahead, bring it to the party, and enjoy watching people’s faces when they taste that first bright, creamy bite. If you try it, snap a picture and tell me how it went — I love hearing which parts your family fought over (for us, it’s usually the crust). Happy baking (or pre-making)!

Lemon Raspberry Layered Pie
Ingredients
Method
- Preheat the oven to 350°F (175°C) if you want a lightly toasted crust. (You can skip baking for a quicker no-bake version — chilling works too.)
- Mix graham crumbs, sugar, and melted butter in a bowl until evenly moistened.
- Press mixture firmly into the bottom and up the sides of your pie dish. Use the back of a measuring cup to compact it.
- Bake 8–10 minutes for a firmer crust, or chill 30 minutes if not baking. Let cool completely.
- For homemade: whisk together 3/4 cup sugar, 3 tbsp cornstarch, 3 egg yolks, 1/2 cup lemon juice, and 2 tbsp lemon zest in a saucepan over medium heat. Cook, stirring constantly, until thickened (about 5–7 minutes). Remove from heat and whisk in 4 tbsp butter until smooth. Chill before using.
- If short on time, a good-quality store-bought lemon curd works wonderfully and saves you a step.
- In a small saucepan, combine raspberries and sugar. Cook over medium heat until raspberries break down (5–7 minutes).
- If you prefer a thicker sauce, stir in the cornstarch slurry and cook 1–2 minutes more until glossy.
- Press through a fine-mesh sieve if you want a seedless sauce; otherwise, leave the seeds for a rustic bite.
- Stir in lemon juice, then cool to room temperature.
- Beat softened cream cheese with powdered sugar and vanilla until smooth.
- In a separate bowl, whip the cold heavy cream to stiff peaks.
- Fold whipped cream into the cream cheese mixture gently, preserving as much lightness as possible.
- Spread a thick, even layer of lemon curd over the cooled crust.
- Spoon half the cream mixture over the lemon layer and smooth.
- Drop small spoonfuls of raspberry sauce across the cream, then use a skewer to drag through and create pretty swirls.
- Add the remaining cream layer on top, smoothing gently. Finish with a few more raspberry dollops and a light swirl if desired.
- Chill the pie for at least 4 hours (overnight is best) so the layers set nicely.
- Garnish with extra raspberries, lemon zest, or mint just before slicing.
- Use a hot, clean knife for neat slices — wipe between cuts.