Cookies & Cream Red Velvet Brownies: A Decadent Twist for Busy Weeknights
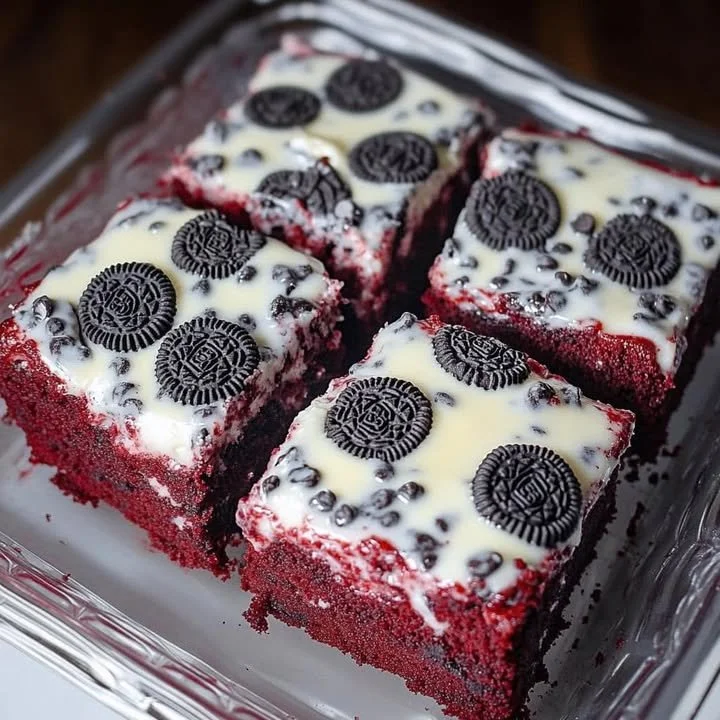
Hello, friend — welcome into my kitchen. If you’re chasing a dessert that feels fancy but comes together fast, these Cookies & Cream Red Velvet Brownies are a tiny miracle. They’re fudgy, slightly tangy from the red velvet base, and studded with crunchy Oreo-style cookies so every bite is a little celebration. Perfect for when the kids announce last-minute playdates, when friends drop by, or when you just need chocolate therapy after a long day.
If you already love classic red velvet, you might enjoy my quick guide to making red velvet brownies for another take on the flavor and texture: chewy red velvet brownie ideas.
A quick note about me (so you don’t think I’m a dessert wizard who owns a culinary castle): I’m Anna, and along with my sister Patricia, we love turning simple ingredients into dishes that make the house smell like comfort and mischief. This recipe grew from one of those “I-have-everything-in-the-pantry” nights and turned into a family favorite.
Why You’ll Love These Cookies & Cream Red Velvet Brownies
- They look impressive but are fuss-free.
- They combine two beloved classics: red velvet and cookies & cream.
- They’re kid-approved and adult-approved — an unusual diplomatic win.
- Leftovers (if there are any) keep well and taste even better after a day.
Ingredients (makes a 9×9-inch pan)
- 1/2 cup (115 g) unsalted butter
- 1 cup (200 g) granulated sugar
- 2 large eggs, room temperature
- 1 teaspoon vanilla extract
- 1 tablespoon cocoa powder (unsweetened)
- 1/4 cup buttermilk (or 1/4 cup milk + 1/2 teaspoon white vinegar)
- 1/2 teaspoon baking powder
- 1/4 teaspoon salt
- 1 cup (125 g) all-purpose flour
- 1–2 tablespoons red food coloring (gel gives better color)
- 8–10 Oreo-style sandwich cookies, coarsely chopped
- Optional: 1/2 cup white chocolate chips or chopped white chocolate
Equipment
- 9×9-inch baking pan
- Mixing bowls
- Whisk and rubber spatula
- Oven preheated to 350°F (175°C)
Step-by-step Directions
-
Preheat and prep. Preheat the oven to 350°F (175°C). Line a 9×9-inch pan with parchment paper, letting a bit hang over two sides for easy removal later. Lightly grease the parchment.
-
Melt the butter and mix. In a small saucepan or microwave-safe bowl, melt the butter until warm and fully liquid. Let it cool slightly so it’s warm but not hot. Stir in the sugar until combined. This helps the sugar dissolve and yields fudgier brownies.
-
Add eggs and flavor. Whisk in the eggs, one at a time, then add vanilla. Whisk until smooth and glossy.
-
Create the red velvet base. Add the cocoa powder, buttermilk (or milk + vinegar), baking powder, salt, and red food coloring. Stir until the batter is an even, vibrant color. Don’t panic if the batter looks a bit thin — that’s okay.
-
Fold in flour. Gently fold in the flour until just combined. Avoid overmixing; a few streaks of flour are fine.
-
Add the cookies & chips. Fold in most of the chopped sandwich cookies and the white chocolate chips, leaving a handful to sprinkle on top for a pretty finish.
-
Bake. Pour the batter into the prepared pan and smooth the top. Sprinkle the remaining cookie pieces on top. Bake for 22–28 minutes, or until a toothpick inserted near the center comes out with a few moist crumbs but not wet batter. If you prefer fudgier brownies, check at 22 minutes.
-
Cool and slice. Let the brownies cool completely in the pan on a wire rack. Use the parchment “handles” to lift the slab out, then slice into 9–16 squares depending on how generous you’re feeling.
Quick notes on texture: These are designed to be slightly fudgy, not cake-like. If you prefer a more cake-y crumb, add an extra 1/4 teaspoon baking powder and bake a few minutes longer.
Cooking Tips (because we all need them)
- Room-temperature eggs blend better and help the batter hold air so the brownies are neither rubbery nor flat.
- If you don’t have buttermilk, whole milk with a little vinegar works great. Let it sit for 5 minutes to thicken.
- Use gel food coloring for a vivid red without watering down the batter.
- For even slices, chill the brownies for 30–45 minutes before cutting. Use a sharp knife wiped clean between cuts.
- Swap in dark chocolate chips if you like a contrast to the sweet white chips.
- Don’t worry if the top cracks a little — it’s a hallmark of good brownies (and gives you texture).
Personal Anecdote
I first made this on a rainy afternoon when Patricia and I were trying to cheer up our teenager after a rough week. We raided the pantry, laughed at our dramatic life updates, and popped these into the oven. The house started smelling like warm cocoa and nostalgia, and by the time the brownies cooled, everyone was grinning. They’ve since become my go-to “I need chocolate and hugs” treat.
Serving Suggestions and Pairings
- Warm with a scoop of vanilla or homemade 3-ingredient ice cream for a no-fuss sundae — a lovely pairing for a quick celebration: three-ingredient ice cream pairing ideas.
- Top with whipped cream and extra cookie crumbs for guests.
- Cut smaller squares for potlucks so everyone can try one.
- Store leftovers in an airtight container at room temperature for up to 3 days, or refrigerate for up to a week. They also freeze well — wrap squares individually for a grab-and-go treat.
Variations to Try
- Make a marbled version: drop dollops of cream cheese frosting on the batter and swirl gently before baking.
- Use chocolate sandwich cookies with vanilla filling for classic cookies & cream flavor; for a minty twist, try mint sandwich cookies.
- Add a pinch of espresso powder to the batter to deepen the chocolate notes.
FAQs (short and sweet)
Q: Can I substitute ingredients if I don’t have all-purpose flour?
A: You can use 1:1 gluten-free flour blends in most cases, but texture may change slightly. For whole wheat, expect a denser crumb.
Q: How can I make these without food coloring?
A: You’ll still get a tasty chocolate cookie bar — skip the food coloring and think of them as cookies & cream chocolate brownies instead.
Q: Are these the same as cookies and cream brownies?
A: They’re a hybrid. These are red velvet brownies with cookies & cream elements, so you get that velvety tang plus crunchy cookie pieces.
Q: Can I use store-bought brownie mix?
A: Yes! Use a red velvet or chocolate mix and fold in chopped cookies and white chips. It’s an easy shortcut for busy nights.
Q: Can I make these ahead for a party?
A: Absolutely. Bake a day ahead and store airtight; add fresh cookie crumbs right before serving.
A little about timing and tricks for busy cooks
I hear you — life is full. This recipe is forgiving: prep takes about 10–15 minutes, bake time under 30, and the clean-up is minimal if you line the pan. It’s perfect for busy moms, professionals balancing dinner and homework, and anyone who wants dessert without drama.
Bringing in the chef’s voice
Patricia and I always say food is a love note you can eat. These brownies are exactly that: quick to make, comforting to share, and a little bit fun (because who doesn’t want cookie chunks in their brownie?). If you want more dessert ideas that are approachable and make you look like a hero, I share plenty of favorites in the dessert section of the blog.
Conclusion
If you’re curious about other takes on this idea, check this fun alternate recipe for a version of these bars from a different kitchen at this Red Velvet Cookies and Cream Brownies recipe. For another creative spin and baking tips, browse a baker’s version at Red Velvet Cookies and Cream Brownies – bakes & recipes.
Meta description (150 characters)
Cookies & Cream Red Velvet Brownies: rich, easy, and perfect for busy weeknights or parties—an indulgent, quick dessert your family will love. Try it!
There you go — warm, fudgy, and a little bit crunchy. If you make them, send a photo or tell me which cookie you used. Patricia and I love hearing how a recipe fits into your life — the small victories (and sneaky bites) are the best part.
Cookies & Cream Red Velvet Brownies
Ingredients
Method
- Preheat the oven to 350°F (175°C). Line a 9x9-inch pan with parchment paper, letting a bit hang over two sides for easy removal later. Lightly grease the parchment.
- In a small saucepan or microwave-safe bowl, melt the butter until warm and fully liquid. Let it cool slightly. Stir in the sugar until combined.
- Whisk in the eggs, one at a time, then add vanilla. Whisk until smooth and glossy.
- Add the cocoa powder, buttermilk (or milk + vinegar), baking powder, salt, and red food coloring. Stir until combined.
- Gently fold in the flour until just combined.
- Fold in most of the chopped sandwich cookies and the white chocolate chips, leaving a handful to sprinkle on top.
- Pour the batter into the prepared pan and smooth the top. Sprinkle the remaining cookie pieces on top.
- Bake for 22–28 minutes or until a toothpick inserted near the center comes out with a few moist crumbs.
- Let the brownies cool completely in the pan on a wire rack. Use the parchment to lift out and slice into squares.