
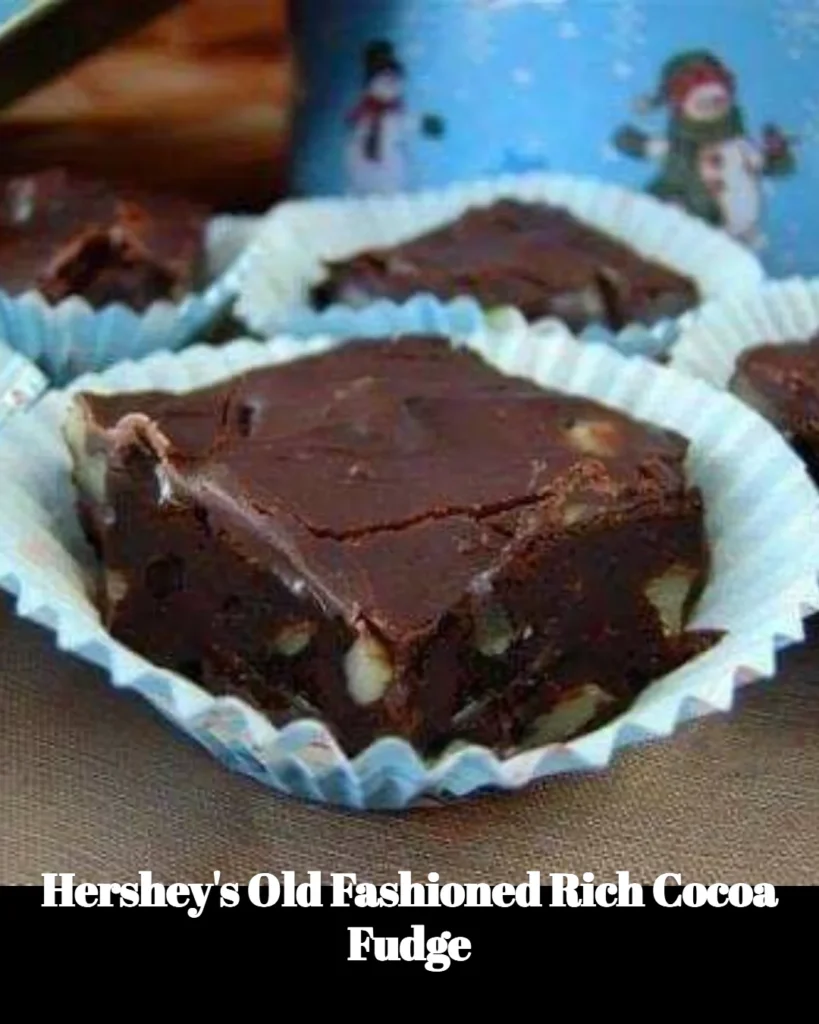
Hershey’s Old Fashioned Rich Cocoa Fudge: A Sweet Slice of Nostalgia
If you’re like me, there’s nothing quite like the comforting embrace of a rich, chocolatey treat after a hectic day. Hershey’s Old Fashioned Rich Cocoa Fudge is not just a recipe; it’s a delightful journey back to childhood. Picture this: the heavenly aroma of melting chocolate wafting through the kitchen, tantalizing your senses as you prepare to indulge in a silky-smooth fudge that melts in your mouth. Whether you’re looking to impress the kids, whip up a quick gift for a neighbor, or treat yourself after a long week, this fudge is the perfect solution.
Why You’ll Love This Hershey’s Old Fashioned Rich Cocoa Fudge
This Hershey’s Old Fashioned Rich Cocoa Fudge isn’t just any dessert; it’s a simple but soul-soothing way to celebrate life’s little moments. Maybe you need to add a bit of sweetness to a tough week or perhaps you’re trying to recreate the dreamy desserts your grandma used to make. Either way, the great news is that this recipe is not only easy to make but also packs a nostalgic punch that will warm your heart and make your taste buds sing!
Ingredients
To make this delectable fudge, grab the following ingredients:
- 2 cups of granulated sugar
- 1/2 cup of unsweetened Hershey’s Cocoa powder
- 1/2 cup of milk
- 1/4 cup of butter (and yes, it’s got to be real butter)
- 1 teaspoon of vanilla extract
- A pinch of salt (because life is all about balance!)
Steps to Sweet Satisfaction
Let’s dive right into making this rich cocoa fudge that’ll make your kitchen smell heavenly!
-
Prep Your Pan: Start by lining an 8-inch square baking dish with parchment paper or aluminum foil, leaving some overhang so you can easily lift out the fudge later.
-
Combine Ingredients: In a medium saucepan, combine the sugar, cocoa powder, milk, butter, and salt. Over medium heat, stir constantly until everything is well-mixed and the butter is melted. Don’t worry if it looks a bit lumpy—that’s just part of the magic!
-
Bring to a Boil: Once everything is combined, raise the heat slightly and bring the mixture to a boil. Keep stirring. You want this fudge nice and smooth! Let it boil for 4-5 minutes without stirring. It’s a test of patience, but I promise it’s worth it.
-
Check for Soft Ball Stage: To know when it’s ready, take a spoonful of the fudge and drop it into a bowl of cold water. If it forms a soft ball, you’re golden. If not, keep boiling for another minute.
-
Add the Good Stuff: Remove the saucepan from heat. Stir in the vanilla extract. This is where the experience gets real, my friends! Let it cool for just a minute or two.
-
Pour and Set: Carefully pour the fudge into the prepared baking dish, spreading it into an even layer. Let it cool completely at room temperature (or pop it in the fridge if you’re feeling impatient).
-
Cut and Enjoy: Once the fudge has set (about 2 hours), lift it out using the parchment paper overhang, cut it into squares, and prepare for an avalanche of compliments!
Cooking Tips for The Perfect Fudge
- Stay present: Stirring is key! If you take a second to scroll through your phone, your fudge could turn from creamy to rocky before you know it.
- Use a candy thermometer: If you have one, great! You’re aiming for about 234°F to 240°F (soft ball stage). If not, go with the cold water test and trust your instincts.
- Extra toppings? Why not!: Consider adding chopped nuts or a sprinkle of sea salt on top before it sets for an extra special kick.
A Dash of Personal Story
I remember the first time I made this fudge. My sister Patricia and I were in high spirits, bouncing around our kitchen, trying to create a little magic with simple ingredients. We ended up with fudge so delicious that even our picky eaters (a.k.a. our children) were begging for more. Now, it’s a beloved staple at every family gathering, proving that some recipes truly stand the test of time.
FAQs About Hershey’s Old Fashioned Rich Cocoa Fudge
Can I substitute any ingredients in Hershey’s Old Fashioned Rich Cocoa Fudge?
Absolutely! Want to cut down on sugar? Try using a sugar substitute made for baking. Just keep in mind that it may change the texture slightly.
How can I store leftovers?
Store the fudge in an airtight container at room temperature for up to a week. It won’t last that long, though; trust me!
Can I add other flavors?
Oh, you bet! Feel free to spice it up with a dash of espresso powder or add some peppermint extract for a seasonal twist.
Indulging in a piece of Hershey’s Old Fashioned Rich Cocoa Fudge just brings everything together, doesn’t it? With a recipe that’s quick, easy, and downright scrumptious, you’re bound to have a new favorite in your dessert lineup.
So, go ahead, grab that apron and bring a little joy to your kitchen today. After all, life is too short not to enjoy fudge!
For more delightful recipes, check out my post on easy chocolate desserts for additional sweet inspiration!
Sweeten your day with Hershey’s Old Fashioned Rich Cocoa Fudge: quick, satisfying, and perfect for sharing. Experience the nostalgia with every bite!
Hershey's Old Fashioned Rich Cocoa Fudge
Ingredients
Method
- Line an 8-inch square baking dish with parchment paper or aluminum foil, leaving some overhang.
- In a medium saucepan, combine the sugar, cocoa powder, milk, butter, and salt. Stir constantly over medium heat until the mixture is well-mixed and the butter has melted.
- Raise the heat slightly and bring the mixture to a boil, stirring continually. Boil for 4-5 minutes without stirring.
- Test for the soft ball stage by dropping a spoonful of fudge into a bowl of cold water. If it forms a soft ball, it's ready.
- Remove from heat and stir in the vanilla extract. Let it cool for a minute or two.
- Pour the fudge into the prepared baking dish and spread it into an even layer. Let it cool completely at room temperature or refrigerate to speed up the process.
- Once set (about 2 hours), lift the fudge out using the parchment paper overhang and cut into squares.