Mini Cheesecakes: Bite-Sized Bliss for Busy Days
Mini Cheesecakes are one of those desserts that feel fancy without the fuss — perfect for busy moms, weeknight bakers, or anyone who loves a sweet finish that doesn’t require a full-time commitment. Hi, I’m Anna (and yes, Patricia is usually nearby taste-testing). We love turning simple ingredients into extraordinary moments, and these mini cheesecakes are my go-to when I want something charming, portable, and utterly delicious.
If you love a little caramel and chocolate with your cheesecake, you’ll enjoy this spin on a classic — and if you want a gooey, more decadent version, check out my take on gooey mini caramel chocolate cheesecakes for inspiration.
Why You’ll Love This Mini Cheesecakes
- They’re quick to make and perfect for small gatherings, potlucks, or dessert after a busy week.
- Each bite is perfectly portioned, which makes them irresistible for kids (and adults who still love bite-sized treats).
- You can dress them up for parties or keep them simple for everyday indulgence.
- The basic recipe is flexible — swap toppings, add fruit, or drizzle caramel for extra charm.
Ingredients (Makes 24 mini cheesecakes)
Crust
- 1 1/2 cups graham cracker crumbs (about 12 full crackers)
- 6 tablespoons unsalted butter, melted
- 2 tablespoons granulated sugar
Filling
- 16 ounces (2 packages) cream cheese, room temperature
- 2/3 cup granulated sugar
- 2 large eggs, room temperature
- 1 teaspoon vanilla extract
- 2 tablespoons sour cream or Greek yogurt (for a touch of tang)
- 2 tablespoons all-purpose flour (helps keep them from cracking)
Toppings (optional, but delightful)
- Fresh berries (strawberries, raspberries, or blueberries)
- Lemon curd or berry compote
- Caramel sauce or chocolate ganache
- Whipped cream
Kitchen tools you’ll need
- Standard 12-cup muffin pan (or two pans) and 24 paper liners
- Mixing bowls, electric mixer, spatula
- Measuring cups and spoons
How to Make Mini Cheesecakes (Step-by-Step)
-
Prep the oven and pan
- Preheat your oven to 325°F (163°C). Place paper liners in a standard muffin tin (you’ll need two tins or bake in two batches). This recipe is perfect for when your day is busy but you want something homemade.
-
Make the crust
- In a medium bowl, combine graham cracker crumbs, melted butter, and sugar. Stir until the mixture clumps when pressed.
- Pinch about 1 tablespoon of the crumb mix and press it into the bottom of each liner to form an even crust. A small glass or the back of a spoon works great to compact it.
-
Make the filling
- In a large bowl, beat the room-temperature cream cheese until smooth and free of lumps (scrape the bowl well). Add sugar and beat until combined.
- Add eggs one at a time, mixing on low speed after each. Stir in vanilla, sour cream (or Greek yogurt), and flour. Mix just until smooth — don’t overbeat.
-
Fill the cups
- Spoon the filling over the crusts, filling each liner almost to the top (about 3/4 full). A small cookie scoop or two spoons helps keep sizes even.
-
Bake
- Bake at 325°F for 15–18 minutes, or until the centers are set but still slightly jiggly.
- Turn off the oven, crack the oven door, and let the mini cheesecakes cool inside for 15 minutes to reduce cracking.
-
Chill
- Remove the pan from the oven and let the cheesecakes cool at room temperature for 30 minutes. Then refrigerate for at least 2 hours, or overnight if you can wait (totally worth it).
-
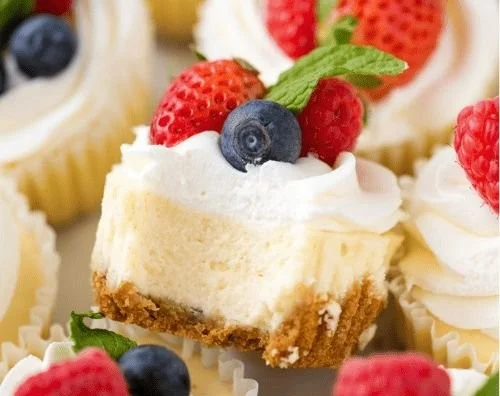
Add toppings and serve
- Top with fresh berries, a spoonful of lemon curd, a drizzle of caramel, or a dollop of whipped cream right before serving.
Quick note on baking times: ovens vary, so watch for the edges to be set and the centers still a bit wobbly. That wobble sets into creamy perfection as they chill.
Practical Tips for Perfect Mini Cheesecakes
- Room-temperature ingredients: This is the single most helpful tip. Let cream cheese and eggs sit out for 30–60 minutes so the filling mixes smoothly.
- Prevent cracks: Mixing on low speed and not overbaking helps. The “cool in the open oven” trick reduces sudden temperature changes.
- Make ahead: These are great a day or two in advance. Keep them chilled in an airtight container — they actually taste better after resting.
- No muffin tin? Use silicone mini molds or small ramekins, adjusting baking time slightly for deeper cups.
- Want a lighter crust? Use crushed vanilla wafers or shortbread cookies instead of graham crackers.
A Little Kitchen Story (because food is memory)
This recipe became my “leave-at-the-school-play” dessert after a night when I juggled homework, dinner, and PTA notes. I needed something fast, portable, and crowd-pleasing. I made these in between homework check-ins, and by the time I arrived at the meeting, they were gone in a flash — one mom whispered, “Anna, how do you make tiny desserts taste so comforting?” That’s the joy of bite-sized treats: they deliver big smiles with small effort.
Variations and Flavor Swaps (keep it fun)
- Chocolate lovers: Fold 1/4 cup melted dark chocolate into the filling for a chocolate mini cheesecake.
- Fruity twist: Swirl in 2 tablespoons of raspberry puree before baking for raspberry ripple minis.
- Gluten-free: Use gluten-free graham crackers or crushed gluten-free cookies for the crust.
- No-bake option: If you need to skip the oven, try a quick no-bake cheesecake filling (use whipped cream folded into cream cheese and gelatin or a stabilized whipped cream) and chill until firm.
How to Serve and Store
- Serving: Pop them out of the liners for a neat presentation, or serve them in the liners for easy grab-and-go dessert at parties.
- Storage: Keep in an airtight container in the fridge for up to 4–5 days. For longer storage, freeze them (plain) for up to 2 months; thaw in the fridge before adding delicate toppings.
- Transport: If you’re taking them to an event, place the pan in a shallow cooler or use a cake carrier with a chilled gel pack underneath to keep them firm on warm days.
Common Questions (FAQs)
Q: Can I use low-fat cream cheese?
A: Yes — you’ll still get a tasty result, although full-fat cream cheese gives a richer texture. If you use low-fat, chilling a bit longer helps firm them up.
Q: Can I make these without eggs?
A: You can find egg-free cheesecake alternatives (using cornstarch and extra sour cream or vegan recipes with silken tofu), but the texture will differ from classic mini cheesecakes.
Q: How do I stop the crust from getting soggy?
A: Press the crumbs firmly when forming the crust and pre-chill the pan in the fridge for 10 minutes before baking. If concerned, bake the crust for 3-4 minutes before adding the filling.
Q: Can I double the recipe?
A: Absolutely. Double the ingredients and bake in batches, or use multiple muffin pans if you have them.
Want more cheeky caramel or chocolate spins? I also love pairing these with richer versions — check my round-up of mini caramel cheesecakes if you’re in a saucy mood.
Safety and ingredient swaps
- If you’re serving to folks with dairy allergies, try vegan cream cheese and coconut cream as substitutes for a dairy-free mini cheesecake.
- For a nutty twist, press a few finely chopped toasted nuts into the crust before adding the filling.
Final baking pep talk
Baking is part science, part patience, and a big dash of love. If your first batch isn’t perfectly smooth or the edges are a touch browned, don’t sweat it. These are meant to be enjoyed — imperfectly gorgeous and absolutely tasty. Plus, leftovers taste amazing for breakfast (no judgment here).
Conclusion
Mini Cheesecakes are a little piece of joy you can make between school runs, meetings, or when you need a quick treat to share. If you want extra inspiration or different techniques, check out this helpful guide on Mini Cheesecakes (in a Standard Muffin Pan) – Sally’s Baking, and for more flavor ideas and variations, see Mini Cheesecakes – Live Well Bake Often.
Meta description (150 characters)
Mini Cheesecakes are perfect for busy moms: quick, easy, and delicious bite-sized desserts. Try this mini cheesecakes recipe and impress everyone! now
Mini Cheesecakes
Ingredients
Method
- Preheat your oven to 325°F (163°C). Place paper liners in a standard muffin tin.
- In a medium bowl, combine graham cracker crumbs, melted butter, and sugar. Stir until clumping.
- Pinch about 1 tablespoon of the mix and press into each liner.
- In a large bowl, beat cream cheese until smooth. Add sugar and mix well.
- Add eggs one at a time, mixing on low speed. Stir in vanilla, sour cream, and flour.
- Mix just until smooth.
- Spoon filling over the crusts, filling each liner about 3/4 full.
- Bake for 15-18 minutes, until centers are set but slightly jiggly.
- Turn off the oven, crack the door, and cool for 15 minutes.
- Remove from the oven and cool at room temperature for 30 minutes. Refrigerate for at least 2 hours.
- Top with berries, lemon curd, caramel, or whipped cream before serving.