(Primary Keyword): Mini Chocolate Cheesecake Bites Recipe to Delight Busy Weeknights
Meta description: (Primary Keyword): Mini Chocolate Cheesecake Bites: quick, creamy, and perfect for busy moms. Easy, no-fuss bite-size dessert you’ll make again. Yay!!
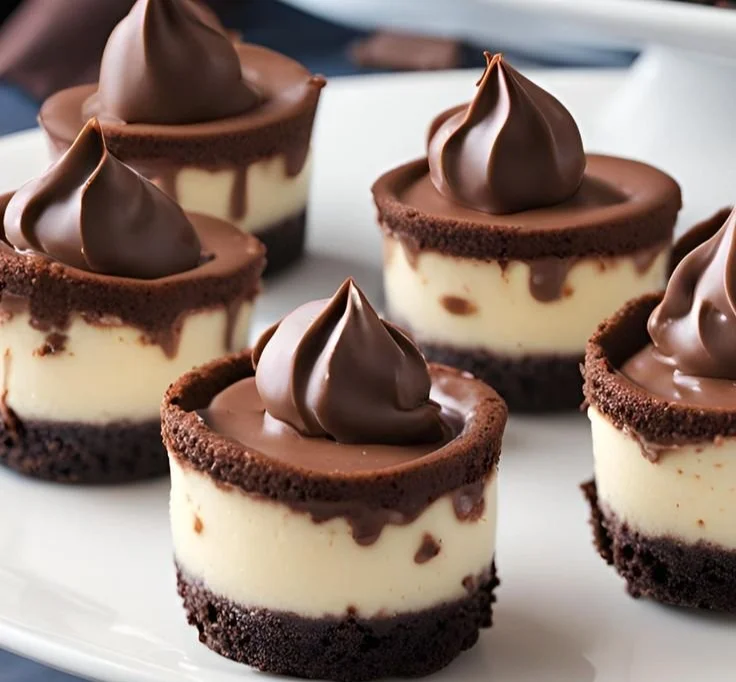
Welcome, friend — whether you’re juggling school drop-offs, emails, or the mysterious art of folding laundry into something human-shaped, I’ve got a treat that feels like a tiny celebration for your kitchen. These Mini Chocolate Cheesecake Bites are perfect for when you want dessert without a weeklong commitment. As you read on, you’ll notice why (Primary Keyword) belongs at the top of your “make-again” list — and if you’re the type who loves other small, gooey delights, check out my take on gooey mini caramel chocolate cheesecakes for even more bite-size inspiration.
Why You’ll Love This (Primary Keyword)
- They’re fast: ready in about 35–45 minutes plus chilling time.
- They’re portion-perfect: no awkward slicing, no crumbs in your pajama pocket.
- They’re versatile: dress them up for a party or keep them casual for a weekday treat.
- They please picky eaters and grown-up chocoholics alike.
These mini gems are a busy mom’s (or busy human’s) best friend: they look fancy but come together without drama. And yes — they freeze beautifully, so you can always have a sweet save in your freezer.
Ingredients (makes about 24 mini bites)
Crust
- 20–24 Oreo cookies, finely crushed (or 1 1/2 cups chocolate cookie crumbs)
- 4 tablespoons unsalted butter, melted
Filling
- 16 oz (450 g) cream cheese, room temperature
- 1/2 cup granulated sugar
- 1 large egg, room temperature
- 1/3 cup sour cream
- 2 teaspoons vanilla extract
- 3 tablespoons unsweetened cocoa powder, sifted
- 1/2 cup semisweet chocolate chips, melted and slightly cooled
Topping (optional)
- Whipped cream or a dollop of ganache
- Mini chocolate chips, shaved chocolate, or cocoa dusting
- Fresh raspberries for a pop of color
Equipment
- 24-cup mini muffin tin
- Paper liners or a nonstick spray
- Electric mixer or sturdy whisk
- Two mixing bowls
Kitchen math and timing: prep 15–25 minutes, bake 12–15 minutes, chill 2 hours (or overnight). If you’re in a rush, pop them in the freezer for 30–40 minutes to set faster.
Directions — the simple, unfussy way
-
Prep the tin and oven.
- Preheat your oven to 325°F (160°C).
- Line a 24-cup mini muffin tin with paper liners or spray with nonstick spray. Paper liners make life easier when unmolding; nonstick spray makes them prettier for serving.
-
Make the crust.
- Place the Oreo cookies in a food processor and pulse until fine crumbs form. If you don’t have a processor, put cookies in a zip-top bag and bash away with a rolling pin.
- Stir crumbs with the melted butter until the mixture clumps when pressed.
- Press about 1 teaspoon of crust mixture into the bottom of each mini cup. Use the bottom of a medicine cup or a small shot glass to compact it firmly. Bake for 3–4 minutes, then remove and let cool while you prepare the filling.
-
Make the filling.
- In a mixing bowl, beat the cream cheese on medium speed until smooth and creamy (about 1–2 minutes).
- Add sugar and beat again until combined.
- Beat in the egg until mixed, then add sour cream and vanilla. Scrape down the sides.
- Sift in the cocoa powder and mix until blended.
- Fold in the melted chocolate chips just until combined — don’t overmix. Taste the batter (yes, a cheeky spoonful is allowed) and adjust sweetness if needed.
-
Fill and bake.
- Spoon the filling over each crust, filling to about 3/4 full (these don’t puff much, so avoid overfilling).
- Bake at 325°F for 12–15 minutes. Centers should be set but still slightly wobbly — similar to a set pudding.
- Turn off the oven and crack the door for 10 minutes to avoid sudden temperature shock (that helps prevent cracking).
- Let them cool at room temperature for 30 minutes, then chill in the fridge for at least 2 hours or overnight.
-
Finish and serve.
- Remove liners gently. Top with a small dollop of whipped cream, a few mini chips, or shaved chocolate. Raspberries are optional but highly recommended for dramatic effect.
- Store in an airtight container for up to 4 days in the refrigerator or up to 2 months in the freezer.
Step-by-step tips so nothing goes sideways
- Room temperature cream cheese is your best friend. Cold cheese makes lumps — and life is too short for lumps.
- Melt chocolate slowly (double boiler or 20-second microwave bursts), then cool for a few minutes so you don’t scramble the egg in the batter.
- If you want a crispier crust, bake the pressed crumbs for 3–4 minutes before filling.
- For smoother mini cheesecakes, push a toothpick through the center before chilling to release steam.
- Want to make them ahead? Freeze fully cooled bites in a single layer on a sheet pan, then transfer to a freezer bag. Pull a few out the night before to thaw in the fridge.
Variations — because dessert should never be boring
- Mint-chocolate twist: add 1/2 teaspoon peppermint extract and swap the chocolate chips for dark chocolate; top with a tiny mint leaf or crushed candy cane. For a bigger mint-chocolate adventure, check my mint chocolate cheesecake cake recipe.
- Peanut butter lovers: swirl 1 tablespoon creamy peanut butter into the batter before baking.
- Oreo overload: use double-stuffed Oreos for an extra-rich crust and sprinkle cookie crumbs on top.
- Lighter option: use reduced-fat cream cheese and a sugar substitute that measures cup-for-cup.
A quick note on ingredients and swaps
- No Oreos? Use graham crackers, chocolate graham crackers, or even crushed pretzels for a salty-sweet crust.
- Don’t have sour cream? Plain Greek yogurt works in a pinch and gives a pleasant tang.
- Sensitive to dairy? Try a dairy-free cream cheese and coconut cream substitute — texture may vary slightly.
Personal slice of kitchen life
I first made these little beauties on a rainy Saturday when my sister Patricia and I were craving something chocolatey but didn’t want the commitment of a full cheesecake. We each grabbed one (or three) and sat on opposite ends of the couch, trading childhood stories and rating each bite like it was a tiny gourmet contest. Ever since, these mini cheesecakes have been my go-to for potlucks and for surprising neighbors with an unexpected sweet hello. They’re small, but they carry a lot of love — and chocolate.
FAQs — quick answers for busy bakers
Q: Can I substitute heavy cream for sour cream?
A: Yes. Heavy cream will give a richer, slightly looser texture. Stir in a tablespoon at a time and watch the batter consistency.
Q: Can I make these without an egg?
A: You can try an egg substitute (like an egg replacer or 1/4 cup mashed banana), but texture will be a touch different — slightly denser and less custardy. If you’d like the classic feel, stick with the egg.
Q: How do I store leftovers?
A: Refrigerate in an airtight container for up to 4 days. Freeze for up to 2 months; thaw in the fridge overnight before serving.
Q: Will these crack when they bake?
A: Mini cheesecakes crack less than large ones. Avoid overbaking and use the oven-cool trick (turn off oven and crack door) to reduce the chance of cracks.
Q: Can I make them gluten-free?
A: Absolutely. Use gluten-free chocolate cookies for the crust and check that all other ingredients are labeled gluten-free.
Helpful kitchen mindset (because we all need permission)
- If a bite looks imperfect, that means it was made in a real kitchen. Imperfections = charm. Serve confidently.
- Taste as you go where safe (e.g., batter after eggs are mixed and chocolate melted). It’s one of life’s simple pleasures.
Final serving ideas and entertaining notes
- For a brunch or baby shower: display on a tiered tray with small label cards for flavors.
- For an after-dinner treat: pair one mini cheesecake with a spoonful of raspberry coulis or a dusting of espresso powder.
- For kids’ parties: add colorful sprinkles or mini M&Ms on top.
A few last things before you go mix batter and savor the first warm bite: these mini cheesecakes are a crowd-pleaser with minimal fuss. They give you the satisfaction of a baked good without monopolizing your evening. And if you’re ever in a dessert rut, experimenting with a simple swap (like peanut butter or mint) can brighten things up fast.
Conclusion
If you want a little inspiration from other excellent mini cheesecake takes, I recommend trying Life, Love and Sugar’s Mini Chocolate Cheesecakes for a buttery twist, and the lovely Oreo-focused version at If You Give a Blonde Kitchen’s Mini Chocolate Cheesecakes with Oreo Crust for an extra-cookie crunch — both are great companions to this recipe.
Happy baking, friend. If these Mini Chocolate Cheesecake Bites become a hit at your house, come back and tell me which variation stole the show — Patricia and I love a good dessert victory story. (Primary Keyword) was made for moments like this: quick, comforting, and chocolate-forward.
Mini Chocolate Cheesecake Bites
Ingredients
Method
- Preheat your oven to 325°F (160°C). Line a 24-cup mini muffin tin with paper liners or spray with nonstick spray.
- Place Oreo cookies in a food processor and pulse into fine crumbs. Stir crumbs with melted butter until the mixture clumps.
- Press about 1 teaspoon of the crust mixture into the bottom of each mini cup. Bake for 3-4 minutes, then let cool.
- In a mixing bowl, beat cream cheese on medium speed until smooth and creamy.
- Add sugar and mix until combined. Add the egg, then mix in sour cream and vanilla.
- Sift in cocoa powder and mix until blended. Fold in the melted chocolate chips just until combined.
- Spoon filling over each crust, filling to about 3/4 full. Bake at 325°F for 12-15 minutes.
- Turn off the oven, crack the door for 10 minutes. Let cool for 30 minutes, then chill in the fridge for at least 2 hours.
- Gently remove liners and top with whipped cream, mini chips, or shaved chocolate. Add raspberries if desired.