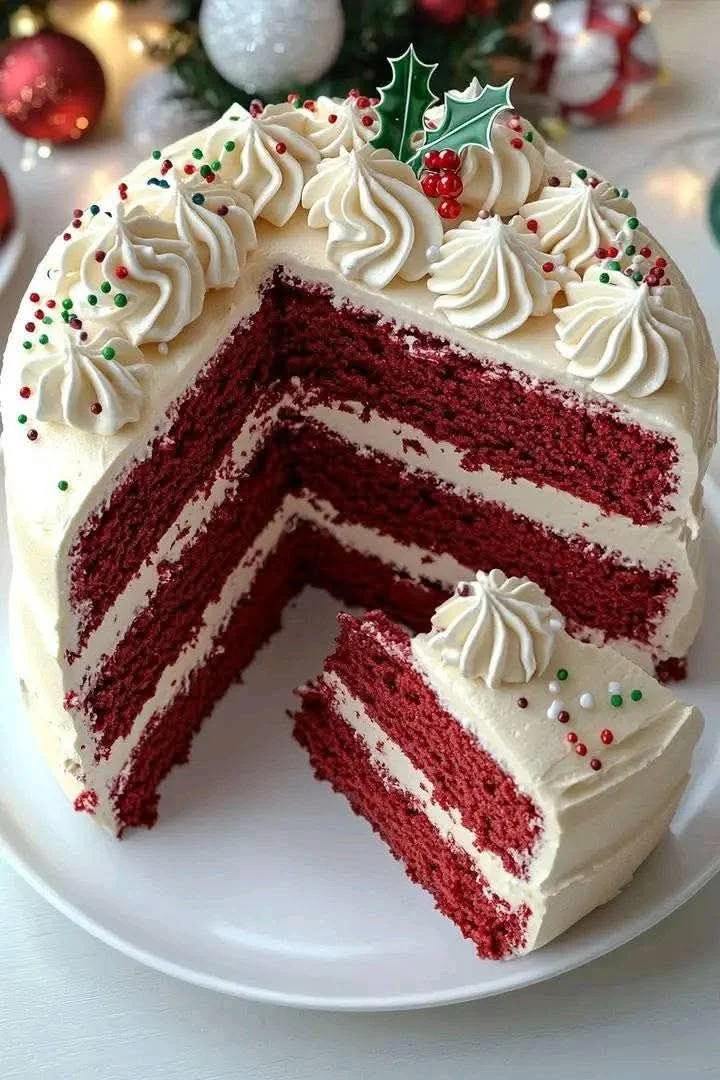
Red Velvet Christmas Cake with White Buttercream Frosting: A Festive Treat
Ah, the holiday season! A time filled with joy, laughter, and, of course, delicious food. If you’re searching for the star of your holiday dessert table, look no further than this gorgeous Red Velvet Christmas Cake with White Buttercream Frosting. It’s not just eye-catching; it’s a slice of festive heaven that will have everyone asking for seconds (or maybe even thirds). Plus, it’s simple enough to whip up even amidst the craziness of holiday prep.
Why You’ll Love This Red Velvet Christmas Cake
There’s something undeniably special about red velvet. The rich color is practically synonymous with celebration, and paired with fluffy white buttercream frosting, it’s a dazzling centerpiece for any gathering. Not to mention, the flavor is a delightful mix of cocoa and vanilla, making it a crowd-pleaser, even for those who claim they’re “not a cake person.”
Whether you’re hosting a family gathering, bringing a dessert to a potluck, or just treating yourself (and we won’t tell if you decide to eat it for breakfast), this cake is perfect! Let’s dive into the deliciousness, shall we?
Ingredients
For the Cake:
- 2 ½ cups all-purpose flour
- 1 ½ cups granulated sugar
- 1 teaspoon baking soda
- 1 teaspoon salt
- 1 teaspoon cocoa powder
- 1 ½ cups vegetable oil
- 1 cup buttermilk, room temperature
- 2 large eggs, room temperature
- 2 tablespoons red food coloring
- 1 teaspoon vanilla extract
- 1 teaspoon white vinegar
For the Frosting:
- 1 cup unsalted butter, room temperature
- 4 cups powdered sugar, sifted
- 2 tablespoons heavy cream (or milk)
- 2 teaspoons vanilla extract
Steps to Baker’s Bliss
-
Preheat the Oven: Begin by preheating your oven to 350°F (175°C), then grease and flour two 9-inch round cake pans. Trust me; a little preparation goes a long way in avoiding sticky situations.
-
Mix the Dry Ingredients: In a large bowl, combine the flour, granulated sugar, baking soda, salt, and cocoa powder. Whisk together until everything is well mixed—think of it as a party for your dry ingredients!
-
Combine the Wet Ingredients: In another bowl, whisk together the vegetable oil, buttermilk, eggs, red food coloring, vanilla extract, and white vinegar. You’ll want a smooth, vibrant mixture that makes your kitchen smell just divine.
-
Blend It All Together: Gradually add the dry ingredients into the wet mixture, stirring just until combined. Remember, you’re not looking for perfection here—lumps are totally fine!
-
Pour and Bake: Divide the batter evenly between the two prepared pans. Bake for 25-30 minutes, or until a toothpick comes out clean. Your cake is not only going to rise; it’s going to make your house smell like a sweet bakery!
-
Cool Down: Once baked, let the cakes cool in their pans for about 10 minutes before turning them out onto wire racks. Allow them to cool completely—patience is a virtue, and your frosting will thank you.
Making the Frosting
-
Beat the Butter: In a medium bowl, beat the unsalted butter with a hand mixer until creamy and light, about 2 minutes.
-
Add Sugar: Gradually add powdered sugar, mixing on low until fully combined. Then, add the heavy cream and vanilla extract. Turn up the speed to high and beat for about 3 minutes until fluffy.
-
Frost Away: Place the top layer of the cake on a serving plate, spread a generous amount of frosting over it, then place the second layer on top. Finish by frosting the top and sides of your masterpiece.
Cooking Tips
-
Tip 1: If you’re in a time crunch, you can bake these layers a day in advance! Just wrap them tightly in plastic wrap and store them in the fridge.
-
Tip 2: Not a fan of food coloring? You can reduce the amount for a more subtle red hue, or skip it altogether for a classic chocolate cake.
-
Tip 3: Craving a little crunch? Consider adding crushed pecans or walnuts to the frosting for a delightful texture.
A Little Holiday Story
This Red Velvet Christmas Cake has been a beloved part of my family’s holiday gatherings for as long as I can remember. I still chuckle at the time my sister Patricia tried to substitute applesauce for some of the oil—let’s just say it was a flavorful experiment, but not one we repeated! This cake brings a delightful blend of flavors that makes you feel all warm and fuzzy inside, especially when shared with loved ones.
FAQs
Can I substitute the buttermilk?
Absolutely! You can use a mix of regular milk and a splash of vinegar or lemon juice. Just let it sit for about 5 minutes!
How do I store leftovers?
Store any leftover cake in an airtight container in the fridge for up to a week. Just be prepared because it might disappear quicker than you think!
Can I make this as cupcakes?
You sure can! Just adjust the baking time to around 15-20 minutes. Watch them closely so they don’t overbake!
This Red Velvet Christmas Cake with White Buttercream Frosting is bound to become a holiday tradition in your home just as it is in mine. As the cake sits beautifully on your table, ready to captivate your guests, don’t forget to take a moment to enjoy what the holidays are truly about—love, laughter, and sharing sweet treats!
So, what are you waiting for? Grab your apron and let’s spread some holiday cheer, one delicious slice at a time!
Want more festive inspiration? Check out my Holiday Cookie Collection for delightful recipes that will surely bring the spirit of joy to your home. Happy baking!
Meta Description:
Red Velvet Christmas Cake with White Buttercream Frosting is the perfect holiday treat. Quick, easy, and delicious—your family will love it! Give it a try!
Red Velvet Christmas Cake with White Buttercream Frosting
Ingredients
Method
- Preheat your oven to 350°F (175°C), then grease and flour two 9-inch round cake pans.
- In a large bowl, combine the flour, granulated sugar, baking soda, salt, and cocoa powder. Whisk together until well mixed.
- In another bowl, whisk together the vegetable oil, buttermilk, eggs, red food coloring, vanilla extract, and white vinegar.
- Gradually add the dry ingredients into the wet mixture, stirring just until combined.
- Divide the batter evenly between the two prepared pans. Bake for 25-30 minutes, or until a toothpick comes out clean.
- Let the cakes cool in their pans for about 10 minutes before turning them out onto wire racks. Allow them to cool completely.
- In a medium bowl, beat the unsalted butter with a hand mixer until creamy and light, about 2 minutes.
- Gradually add the powdered sugar, mixing on low until fully combined. Then, add the heavy cream and vanilla extract. Beat on high for about 3 minutes until fluffy.
- Place the top layer of the cooled cake on a serving plate, spread a generous amount of frosting over it, then place the second layer on top. Finish by frosting the top and sides.