Rustic No Knead Rosemary Garlic Bread That Busy Women Will Love
There’s nothing like the smell of fresh bread filling the house — especially when you didn’t spend your evening kneading until your arms felt like spaghetti. Rustic No Knead Rosemary Garlic Bread is the kind of recipe that feels fancy but behaves like a weeknight friend: reliable, comforting, and a little bit showy when guests arrive. If you’ve been hunting for an easy homemade bread that gives big bakery vibes without the fuss, this is it.
Before we dive in, a little kitchen hello from me: I’m Anna, and together with my sister Patricia we love turning simple pantry staples into dishes that feel special. This no-fuss loaf is one of those gems that has saved more than one hectic dinner in our house. If you like recipes that let flavor do the heavy lifting, keep reading — and if you need another cozy bread option, check out this Rustic Garlic Rosemary Skillet Bread for a skillet twist: Rustic Garlic Rosemary Skillet Bread.
Why You’ll Love This Rustic No Knead Rosemary Garlic Bread
- It’s perfect for busy moms, professionals, and anyone who values a delicious result with minimal hands-on time.
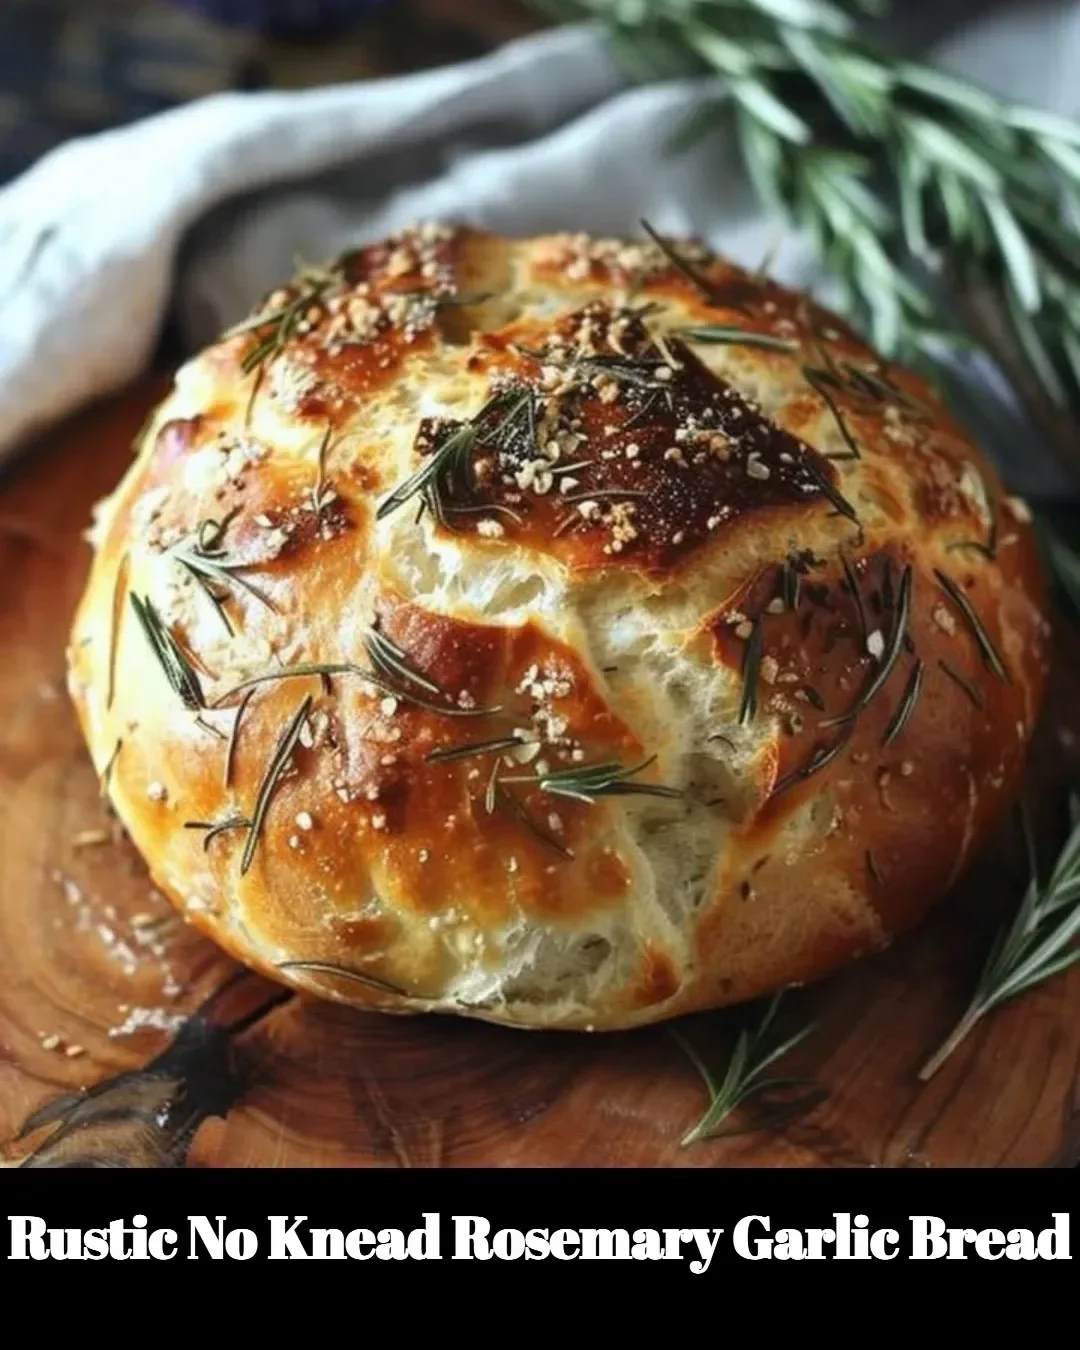
- The rosemary and garlic pair with olive oil to create an aromatic crust and tender crumb.
- No kneading means you can walk away and come back to magic — ideal when the kids need homework help or dinner demands your attention.
- Versatile: serve it with soup, use it for sandwiches, or tear off pieces during a cozy night in.
Ingredients
- 3 cups (360 g) all-purpose flour (or bread flour)
- 1 1/2 teaspoons salt
- 1/2 teaspoon instant yeast (active dry yeast also works)
- 1 1/2 cups (360 ml) warm water (about 100–110°F)
- 2 tablespoons olive oil, plus more for drizzling
- 3 cloves garlic, finely minced (or 2 tablespoons roasted garlic for a mellower flavor)
- 2 tablespoons fresh rosemary, roughly chopped (or 2 teaspoons dried)
- Optional: coarse sea salt for sprinkling
- Optional: 1 tablespoon cornmeal (for dusting the baking surface)
Equipment you’ll need (simple things): a large mixing bowl, a wooden spoon or rubber spatula, a clean kitchen towel or plastic wrap, and a Dutch oven or heavy oven-safe pot with lid. No special machines required.
The Method: Simple Steps, Big Flavor
-
Mix dry ingredients. In a large bowl, whisk together the flour, salt, and yeast. Keep the yeast and salt on opposite sides of the bowl at first if you’re using active dry yeast and are sensitive to yeast-salt interaction — but with instant yeast this isn’t critical.
-
Add wet ingredients and aromatics. Stir in the warm water, 2 tablespoons olive oil, minced garlic, and chopped rosemary. The dough will be shaggy and sticky — that’s exactly right. Don’t fight it.
-
First rise (hands-off). Cover the bowl with a clean kitchen towel or plastic wrap and set it in a warm spot. Let it rise at room temperature for 12–18 hours. You’ll know it’s ready when the surface is dotted with bubbles and it has nearly doubled. This slow fermentation develops flavor with almost no work.
-
Shape gently. Flour your work surface lightly. Turn the dough out, fold it over itself a couple of times to form a loose ball, and let it rest uncovered for 20–30 minutes while you preheat the oven. If you like a more rustic look, reshaping minimally keeps that lovely uneven crust.
-
Preheat your Dutch oven. About 30 minutes before baking, place your empty Dutch oven (lid on) in the oven and preheat to 450°F (230°C). This creates the hot, steamy environment that gives you a crisp crust.
-
Bake. Carefully remove the hot Dutch oven, sprinkle a little cornmeal or flour in the bottom, place the dough seam-side down, drizzle lightly with olive oil, and optionally sprinkle with flaky sea salt and a few rosemary leaves. Cover and bake for 30 minutes. Remove the lid and bake another 10–15 minutes until the crust is deeply golden.
-
Cool and enjoy. Transfer the loaf to a rack and let it cool at least 20 minutes before slicing — I know, that’s the hardest part. Cooling finishes the set of the crumb and keeps the texture from getting gummy.
Quick Two-Hour Option (If You’re in a Rush)
If you need bread today, you can speed things up: use 1 teaspoon of instant yeast, warm water a little warmer (but not hot), and place the dough in a slightly warmer spot (like a turned-off oven with the light on). Expect about 1.5–2 hours total for rise and bake. It won’t have the same depth of flavor as the long ferment, but it will still be delicious — think of it as “beautiful in a hurry.”
Cooking Tips (Because I’ve learned the hard way)
- Don’t panic about sticky dough. No-knead dough is meant to be loose. Use floured hands or a bench scraper to shape.
- Fresh rosemary sings, but dried rosemary works in a pinch. If using dried, crush it between your fingers first to release oils.
- Roast the garlic if you want sweetness without punch. Raw minced garlic gives a bright, garlicky bite.
- Use a probe thermometer for perfect doneness: the loaf should read 200–210°F inside.
- Want an extra-crisp crust? Remove the lid for the final bake and brush the loaf with a little olive oil or water before finishing.
A Little Story From My Kitchen
Patricia and I first made this loaf on a rainy Saturday when I’d promised soup for dinner but was short on babysitting time and energy. We mixed the dough before cartoons ended and came back hours later to a bowl of bubbly dough that felt like a small miracle. The bread stole the show at dinner — both my kids and their friends declared it “restaurant bread.” From that day on, this recipe earned a permanent spot in our rotation for busy nights and casual dinner parties alike.
Variations and Serving Ideas
- Cheesy twist: Gently fold in 1 cup of grated Parmesan or sharp cheddar during shaping for a melty, savory surprise.
- Olive and herb: Add 1/3 cup chopped olives and an extra tablespoon of herbs for a Mediterranean vibe.
- Sweet-savory: Drizzle with honey and sprinkle thinly sliced pears for a warm snack that pairs beautifully with cheese.
FAQs (Short, Helpful Answers)
Q: Can I use whole wheat flour?
A: Yes — swap up to half the all-purpose flour for whole wheat. The loaf will be denser; increase hydration by a tablespoon or two if the dough feels too stiff.
Q: How should I store leftovers?
A: Keep sliced bread in a paper bag or wrapped in a clean towel at room temperature for 1–2 days. For longer storage, slice and freeze; toast slices straight from the freezer.
Q: Can I make this in a stand mixer?
A: You can, but the beauty of no-knead is you don’t need one. If you do use a mixer, just combine ingredients on low — no kneading required.
Q: What if I want to skip the Dutch oven?
A: Use a heavy baking sheet and create steam by placing a metal pan on the rack below with hot water during the first 10 minutes of baking. The result will be great, though a Dutch oven gives the best rise.
Internal Resources to Explore
If you’re in the mood for more bread or similar easy recipes, you might like this Rustic No-Knead Rosemary Garlic Bread variation we kept in our archive: Rustic No-Knead Rosemary Garlic Bread. And for skillet-style baking that’s fast and friendly, check out the Rustic Garlic Rosemary Skillet Bread I mentioned earlier: Rustic Garlic Rosemary Skillet Bread.
A Few Final Encouragements
Baking bread doesn’t have to be intimidating. The no-knead method is forgiving and wonderfully rewarding. Whether you’ve got an overbooked evening or a free afternoon, Rustic No Knead Rosemary Garlic Bread lets you serve something warm, fragrant, and genuinely homemade without a sweat. Keep your pantry simple, your expectations realistic, and your taste buds ready — this loaf will make the whole house smile.
Conclusion
Ready to expand your no-knead repertoire? For another take on timing and techniques, take a peek at this Rosemary Garlic No-Knead Bread, the Two Hour Method for a faster version: Rosemary Garlic No-Knead Bread, the Two Hour Method. And if you want a step-by-step riff with great photos and tips, this Rosemary Garlic Bread {No-Knead!} post is a lovely companion: Rosemary Garlic Bread {No-Knead!}.
Meta description (150 characters):
Rustic No Knead Rosemary Garlic Bread: quick, easy loaf for busy cooks—no kneading, big flavor. Crusty outside, tender inside; bake tonight!

Rustic No Knead Rosemary Garlic Bread
Ingredients
Method
- In a large bowl, whisk together the flour, salt, and yeast.
- Stir in the warm water, 2 tablespoons olive oil, minced garlic, and chopped rosemary until the dough is shaggy and sticky.
- Cover the bowl with a kitchen towel or plastic wrap and let it rise at room temperature for 12–18 hours.
- Flour your work surface lightly. Turn the dough out and fold it over itself a couple of times to form a loose ball.
- Let it rest uncovered for 20–30 minutes while preheating your Dutch oven to 450°F (230°C).
- Carefully remove the hot Dutch oven, sprinkle some cornmeal or flour in the bottom, then place the dough seam-side down.
- Drizzle lightly with olive oil and optionally sprinkle with flaky sea salt.
- Cover and bake for 30 minutes. Remove the lid and bake another 10–15 minutes until the crust is deeply golden.
- Transfer the loaf to a rack and let it cool for at least 20 minutes before slicing.