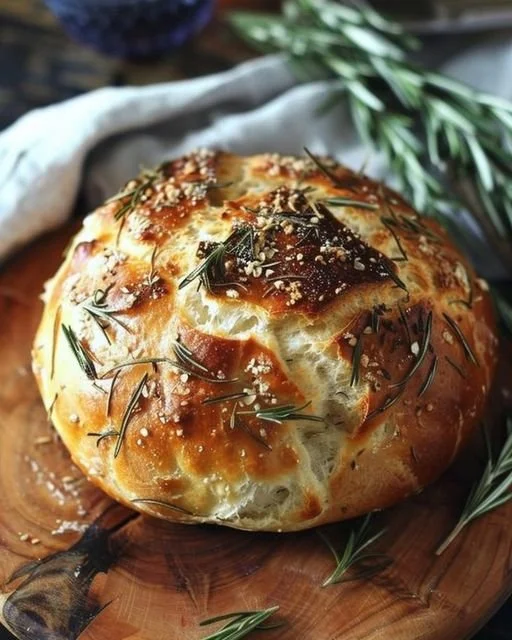
Rustic No Knead Rosemary Garlic Bread: A Simple Delight for Any Occasion
Ah, the joy of baking fresh bread! If you’ve ever walked into a bakery and been met with the warm, inviting aroma of freshly baked bread, you know the magic it brings. That’s why I’m thrilled to share with you the Rustic No Knead Rosemary Garlic Bread recipe. It’s the perfect blend of simplicity and flavor, making it an ideal go-to for busy moms wanting to impress at family dinners or a quick fix for those weeknight gatherings with friends.
Why You’ll Love This Rustic No Knead Rosemary Garlic Bread
I get it. Life can be chaotic—between work, family, and social responsibilities, who has time to knead dough for hours? Enter this Rustic No Knead Rosemary Garlic Bread. It’s a game-changer! This recipe allows you to unleash your inner baker without the need for heavy lifting (literally). Just mix, let it sit, and voila! You’ll have a hearty loaf bursting with the fragrant flavors of rosemary and garlic in no time. Perfect for slathering with butter, pairing with soup, or snacking straight from the bread board!
Ingredients You’ll Need
To whip up this delightful bread, you’ll need the following:
- 3 cups all-purpose flour
- 1½ cups warm water
- 1 teaspoon instant yeast
- 1 teaspoon sugar
- 2 teaspoons sea salt
- 2 tablespoons olive oil
- 2 teaspoons chopped fresh rosemary (feel free to add more if you’re a big fan)
- 3 cloves of garlic, minced (because more garlic, more love, right?)
Steps to Success
Now that you’ve gathered your ingredients, let’s get into the fun part: baking!
Step 1: Mix It Up
In a large bowl, whisk together the flour, yeast, salt, and sugar. This is where the magic begins! Then, add the warm water and olive oil. Stir until you have a shaggy dough. Really, don’t overthink it—this isn’t a yoga class!
Step 2: Add the Flavors
Fold in the chopped rosemary and minced garlic. This step is where the loaf starts to embrace its rich personality. Feel free to taste the mixture (yes, we’re all about that authenticity here), but be warned: you might find yourself needing to fight the urge to eat it raw.
Step 3: Let It Rise
Cover the bowl with plastic wrap or a clean kitchen towel and let it rise in a warm place for 12-18 hours. Yes, you read that right! You could even leave it overnight—like a little baking fairy completing its magic while you sleep.
Step 4: Shape and Preheat
Once your dough has risen (it should be nice and bubbly!), turn it out onto a floured surface. Gently shape it into a rough ball, then cover it again and let it relax for about 30 minutes. Meanwhile, preheat your oven to 450°F (232°C) and place a Dutch oven or heavy pot with a lid inside to heat.
Step 5: Bake, Baby, Bake
When the oven is hot, carefully remove the pot. Transfer your dough to the pot (no fancy pizza stones needed here) and cover it with the lid. Bake for 30 minutes covered, then remove the lid and bake for an additional 15-20 minutes until the top is golden brown and, quite frankly, gorgeous!
Step 6: Cool and Enjoy
Once baked, transfer your loaf to a wire rack and let it cool—if you can resist the temptation to dive straight in! Slice it up, slap on some butter, or serve it alongside your favorite soup. Heaven on a plate!
Cooking Tips for Your Rustic No Knead Rosemary Garlic Bread
- Warm Water Is Key: Make sure the water is warm but not hot. It should feel comfortable to the touch—like a warm hug.
- Fermentation Flexibility: The longer you let the dough rise, the better the flavor. If you’re feeling adventurous, try a 24-hour rise!
- Experiment with Herbs: Don’t hesitate to substitute the rosemary with other herbs like thyme or basil. Your taste buds will thank you.
FAQs
Can I substitute active dry yeast for instant yeast?
Absolutely! Just activate it first by dissolving it in the warm water for about 5-10 minutes before mixing everything together.
How can I store leftovers?
Wrap your cooled bread in a clean kitchen towel and store it at room temperature for up to 3 days, or freeze it for longer storage.
Final Thoughts
Creating your very own Rustic No Knead Rosemary Garlic Bread is about embracing the moment and reveling in the delightful aromas that fill your kitchen. Life is fast-paced, and sometimes we forget to take a breather and enjoy the small things—like the satisfying crunch of a freshly baked crust and the warmth that only homemade bread can provide. So go ahead, grab those simple ingredients, and let’s whip up some cozy memories together!
For more delicious and easy-to-follow recipes, check out my latest posts on wholesome family meals and decadent desserts. Happy baking!
Meta Description
Rustic No Knead Rosemary Garlic Bread is the perfect recipe for busy families. Quick, easy, and delicious, this dish will become your go-to meal. Try it today!

Rustic No Knead Rosemary Garlic Bread
Ingredients
Method
- In a large bowl, whisk together the flour, yeast, salt, and sugar.
- Add the warm water and olive oil, stirring until a shaggy dough forms.
- Fold in the chopped rosemary and minced garlic.
- Cover the bowl with plastic wrap or a clean kitchen towel and let it rise in a warm place for 12-18 hours.
- Preheat the oven to 450°F (232°C) and place a Dutch oven or heavy pot with a lid inside to heat.
- Once the dough has risen, turn it onto a floured surface and shape it into a rough ball.
- Cover it again and let it relax for about 30 minutes.
- Carefully transfer the dough into the hot pot, cover it with the lid, and bake for 30 minutes.
- Remove the lid and bake for an additional 15-20 minutes until the top is golden brown.
- Transfer the loaf to a wire rack and let it cool before slicing.
- Serve with butter or alongside your favorite soup.